Photographing large vehicles on a bright day
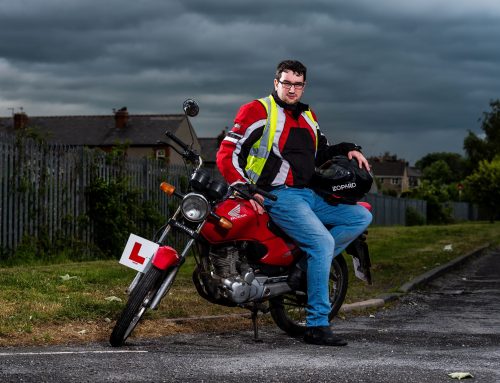
Automotive work is something I particularly enjoy. I don’t mean just the exotic cars, although they certainly have their appeal. I’m talking about anything, and pretty much everything. Your exotic cars tend to be a bit of a crowd puller, no matter how they are photographed. Large artics, buses, gritters, refuse lorries, motorcycles and family saloons all present very different challenges, and need a different approach.
Generally speaking, I use two light sources for most car shoots, or motorcycles etc. There’s no way I can get away with two for a huge artic, or eighteen wheeler. Well, not if I want it to look half way decent.
There’s a number of points to take into account when photographing vehicles. You need to avoid harsh specular highlights on the glossy paintwork or chrome, caused by your light sources. Bearing in mind, light travels in straight lines, it tends to be fairly straightforward to visualise where the light will go once it hits the vehicle.
The second biggest issue is just trying to light the damned thing evenly, particularly anything over large car size. I’ve found I can get away with just two lights on a refuse lorry, but that’s pretty much the biggest vehicle I can get away with two lights, and I have to pay very careful attention to the light spread and position. Taller light stands also help.
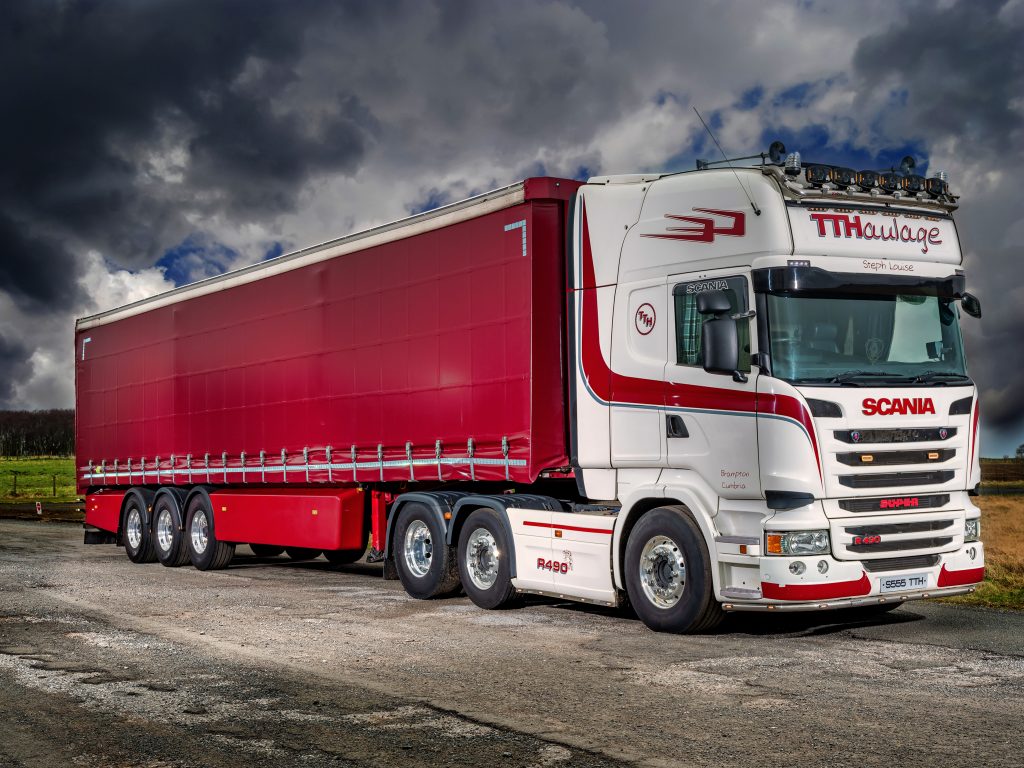
Frame right, I placed an ELB500 firing through a 45° high intensity reflector at maximum output, which is 6.3 (Equivalent to 500Ws). The lightstand is 2.7m tall, and the head was angled downwards towards the front of the truck. It was straight on to the front, which meant any flash back would be towards the head itself, and would mitigate the possibility of any harsh specular highlights. You can see a slight highlight on the near corner of the cab, where the bodywork curves around to the side, but that’s pretty much it.
A second ELB500 was placed frame left, and not too far from the camera. Again, a 45° high intensity reflector was used with the power at maximum output. The stand was again a 2.7m with the head angled slightly down and towards the trailer, at the point it meets the cab. Any reflected light would be away from the camera, and in the direction of the back of the trailer.
About a third of the way along the trailer and just out of frame left, I placed a third ELB500, firing through a 65° high intensity reflector at an output of 5.0 (Equivalent to 200Ws) and at a height of 2.5m, angled towards the back of the trailer. You may ask why a stop and a third less light. Whilst the 65° reflector puts out less light than the 45°, I was able to place the stand much closer, without fouling the frame. The wider spread of the 65° also allowed decent coverage whilst closer.
A fourth ELB500 was placed about halfway along the trailer, and used to light the remaining third of the vehicle. It was firing through another 65° high intensity reflector at an output of 5.0 (Equivalent to 200Ws), and again at a height of 2.5m.
Yes, I know a behind the scenes image, even snapped on a phone, is far better than a bunch of text. I tend not to remember to get a BTS shot. I’m old and my memory is crap!
Meh!
Now, the interesting bit.
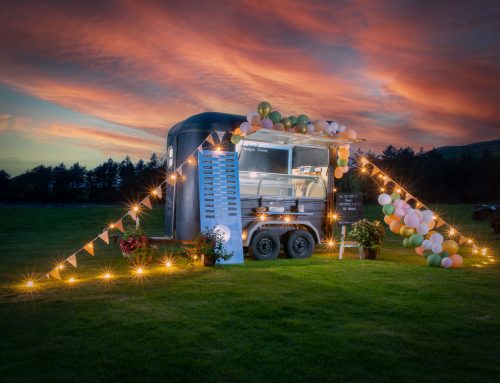
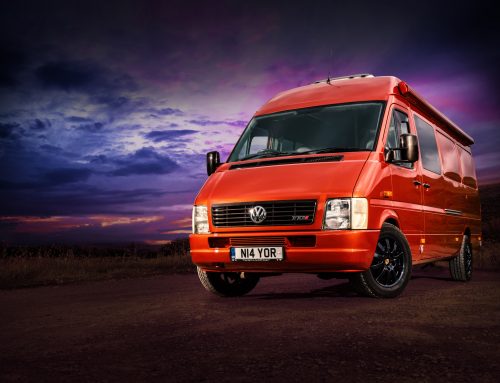
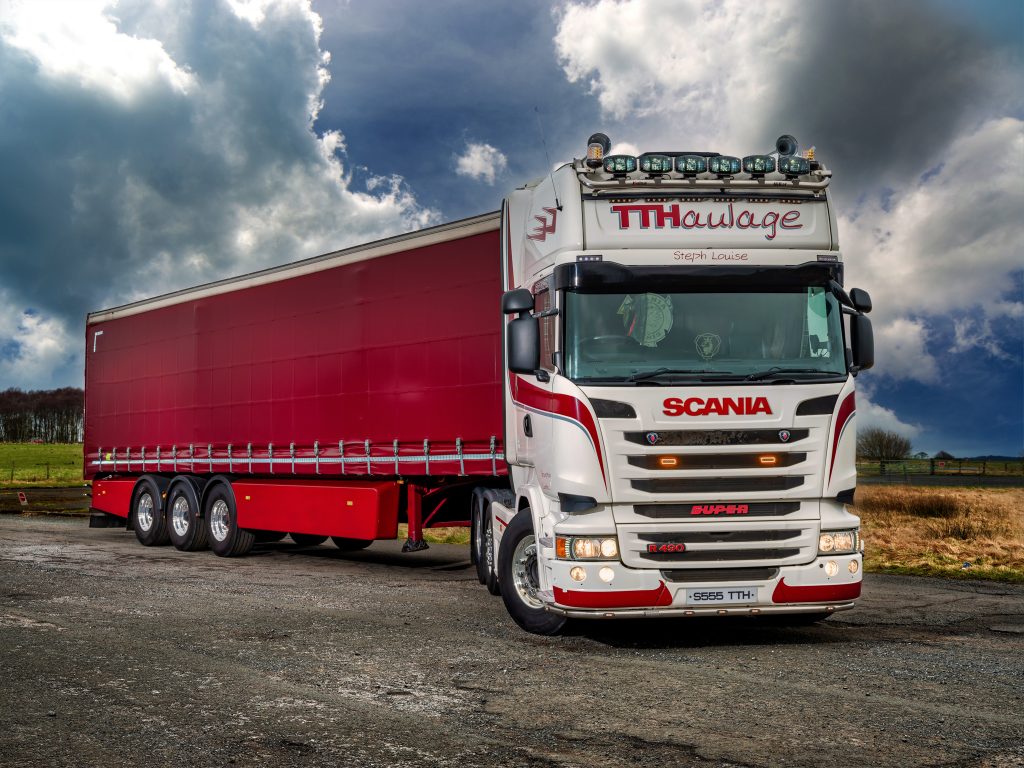
This isn’t a single image, but rather a blending of five images. Basically, it’s an HDR so as to give greater dynamic range, allowing me to pull more detail from both the highlights and shadows. But before we get into that, here’s another image to stop you getting bored. Similar lighting and exposure technique…
Now, getting back to the exposure. The camera was placed on a tripod at about shoulder height, putting it pretty much level with the base of the windscreen, and helping to reduce any perspective distortion. With the camera set to 1/125th sec f8 and ISO200, I had a good average exposure. It wasn’t sunny, despite the sky looking like it may have been. In truth, I had fleeting and patchy sunny spells, but I waited for the dull periods to aid my exposure.
I wanted to under expose the ambient by one stop, so as to saturate the sky, and also to ensure the lorry “popped” a little against the background. This was achieved by closing the aperture from f8 to f11, one full stop difference.
My exposure was now set at 1/125th sec f11 and ISO200 and this was my “Neutral” exposure. Traditionally, HDRs are shot using a variation in shutter speed, but this would cause issues due to the maximum x-sync for the flash being exceeded. Not only that, the changes to the shutter speed would have no impact on the lit areas of the frame (Where it was below the x-sync maximum). An alternative would be to use the aperture to bracket, as this would certainly affect both the ambient and lit areas of the frame, but would cause some pretty funky goings on with the depth of field. Definitely not recommended.
That leaves the ISO for bracketing. It would affect both the ambient and lit areas, and allow me to get five images without climbing too high in the ISO range. Incidentally, noise isn’t quite the issue at higher ISO as it is in a single exposure. The blending during the HDR processing goes some way to reduce the affects of noise.
The image was taken at 1/125th sec, f11 at ISO 50, 100, 200, 400 and 800. The raw files were processed in Lightroom, creating the HDR dng file, which was then exported as a jpeg after some slight tweaking. This was then taken into Photoshop for a few further tweaks and cleanup. If I find there are areas I need to blend manually, I export the other files from Lightroom as jpegs, and then add them as masked layers in Photoshop, and brush through to get what I need.
Exactly the same technique used here.
I tend to use the camera manufacturers app to communicate with the camera, and make the ISO adjustments, as it reduces the risk of camera movement. Although I have made use of a standard cable release, and very, very gently turned the command dial to make the ISO changes.
This certainly isn’t a quick procedure. Besides making the changes to the ISO, I have to allow the lights to recycle fully. That said, they are ready to go as soon as I have changed the ISO.
My automotive photography portfolio can be found here and also here.