Using The OM SYSTEM Cameras For Automotive Photography
I have used many camera systems over the years, for various aspects of my work, including food, automotive, property and products etc.. Starting with film cameras such as Fujica, Contax and Nikon, before stubbing a tentative toe into the realm of digital cameras. The impact of digital on the commercial photography world still holds surprises, which I expect to continue with the launch of the new OM System OM1. However, let’s talk about the use I’ve put the OM System cameras to, with regards to my automotive work.

I know there are arguments for larger sensors, creating specific looks blah blah blah. However, I particularly like the specific look I get from the Olympus/OM System cameras. I say Olympus, because at the time of writing this, my kit is still based around the Olympus OM-D EM-1 mkII.
Why didn’t I upgrade to the mkIII or the EM-1X? Well, there were certainly performance advances, and advances in image quality with the newer models. But my mk II bodies were fine, and for me, the advances just didn’t warrant the cost of replacing two bodies. That is definitely about to change with the newly released OM-1.
However, I digress. So, how do I get my automotive images when shooting with an E-M1 mkII? Let me walk you through a shoot.

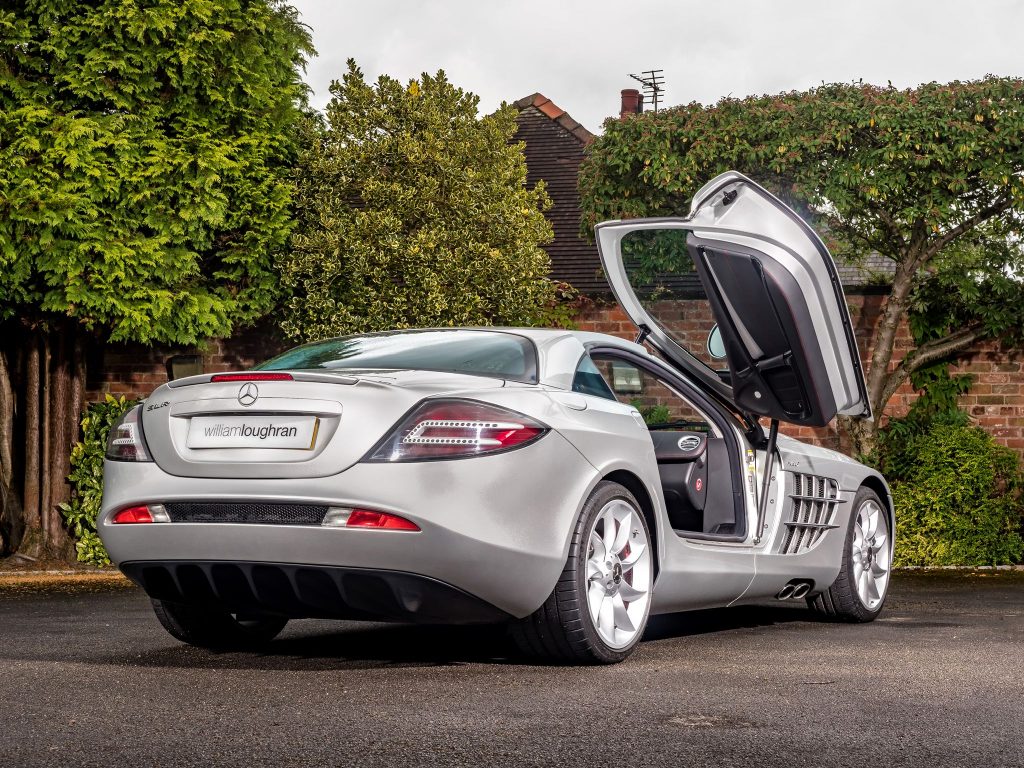
I had the opportunity to photograph the rather beautiful Mercedes SLR McLaren at William Loughran, esteemed supplier of performance and luxury cars, based in Preston.
It was a rather overcast day when I arrived to photograph this particular car. Not necessarily a bad thing, but I would have to be mindful to accentuate each curve and texture with my own lights, as I wouldn’t have the “free” third light as an overall key light, or additional accent light. The free light obviously being the sun, that rather rare and unreliable occurrence, here in the UK.
Frame left, and straight on, towards the bonnet of the car, I placed an Elinchrom ELB400, firing through a 65° high intensity reflector at an output of 5.0 (Equivalent to 200Ws). It was at a height of around five feet and angled towards the centre of the bonnet.
For the right frame side of the vehicle, I placed an ELB1200, firing through another 65° high intensity reflector at an output of 6.0 (Equivalent to 400Ws). It was positioned to fire straight on to the side of the car. The test shot showed the highlight from reflection of the head just behind the door aperture. I moved the lightstand a little towards me, so the highlight was lost in the open door aperture.
Now, what about the camera?
My base exposure was 1/100th sec f16 at ISO200. I then shot three images, creating a bracketed sequence at ISO 64, 200 & 400. The images were initially combined in Lightroom, with selective additional blending done in Photoshop for detail.
I couldn’t bracket using traditional shutter speed settings, as it would have affected the recorded ambient light. I couldn’t bracket using the aperture settings because not only would it have affected the depth of field between each exposure, it would also have affected the recorded light from the lighting rig. Bracketing the images using the ISO affects the whole exposure, and allows the images to be combined in post. This gives greater detail in the shadows and the highlights, and when processed with a conservative eye, can produce appealing images for the client. (I prefer to manually blend my images, because…. well, I’m a masochist!).
I’ve occasionally had questions regarding sensor noise, particularly on five exposure images using this technique. The action of combining the images during the HDR process, mitigates most of the noise. It’s certainly something that hasn’t worried me with the E-M1 mkII, and I’m looking forward to the OM1 after seeing high ISO examples.
Something else I want to explore, is the high resolution ability. Meaning, I have the potential to capture 80Mp raw files. The camera basically takes eight images, using the image stabilisation system to offset each image, and then combines the images to create an 80Mp raw (or jpeg) file.
I originally played with the HR settings when I first received the mkII all those years ago. It worked very well, but I couldn’t really incorporate it into my workflow. With the advances over the last five years, and especially with the new sensor in the OM1, I’m quite eager to try it once again. I know the computational time required for the image processing is much quicker, which was one of the main drawbacks I originally found with the mkII.
I’ll let you know how I get on.