Review Phottix M200R LED Panel
You know, considering I’m a dedicated stills only type of guy (Of some considerable years, I might add!), I’m getting a lot of LED panels for review. To be honest, I’ve been pleasantly surprised by all those I’ve reviewed, not only by their features and abilities, but by the fact I’ve actually found them useful. That last bit was a genuine surprise, I have to admit.
I’ve used flash for over forty years, and I considered constant light sources to be in the realm of video work. That perception has changed, even with the smaller led panels, which is partly down to the quality of light they produce, and also the available power too.
Anyway, given the fact this is supposed to be a review, I need to stop waffling.
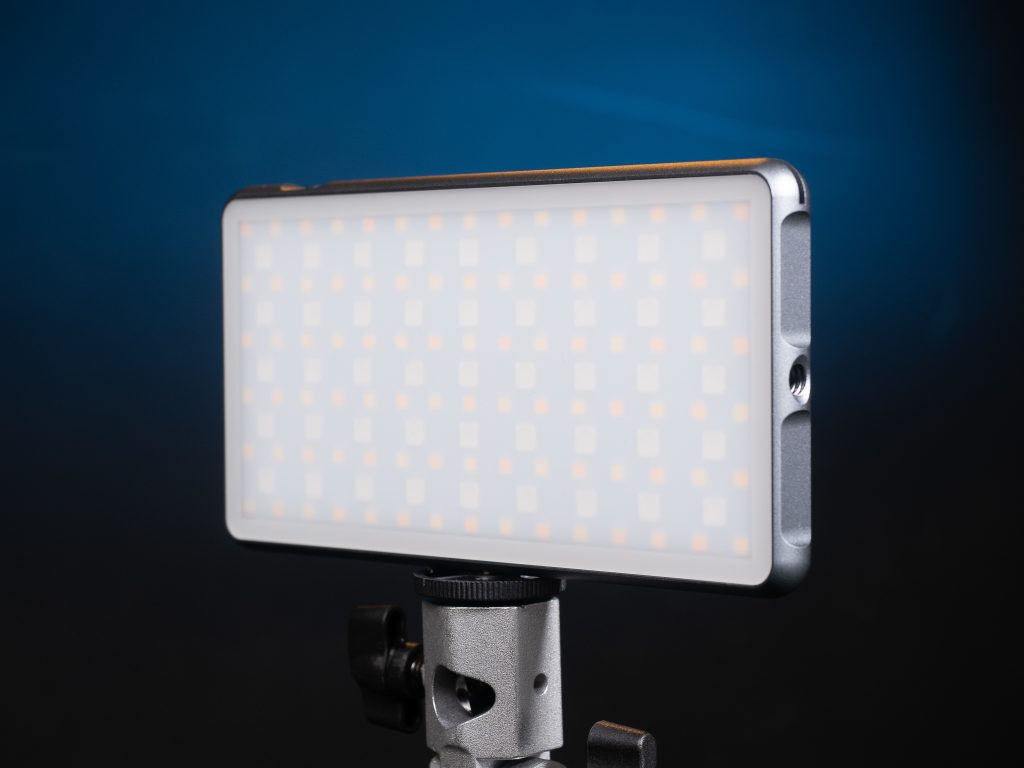
The Phottix M200R is no larger than most phones. Nice and compact, meaning there’s no limitations regarding portability, or where you can take it. If you can pack a phone, you can pack this.
There are two mount points which are the standard ¼” threaded screw mount, allowing the M200R to be fixed to a tripod, angle clamp etc,. There’s one on the bottom, and one on the side opposite the controls. This allows the panel to be orientated in either landscape or portrait, which means the path and spread of light can be best suited to the orientation of the camera. Some of the first panels (and I’m going back a bit, here), used to have a single mount point, which dictated the panel being landscape orientated. So if the user was making use of a phone or camera in portrait orientation, a lot of the light was basically wasted. This also had the knock on effect of requiring more light output to compensate, and therefore shortening the battery life before requiring recharging.
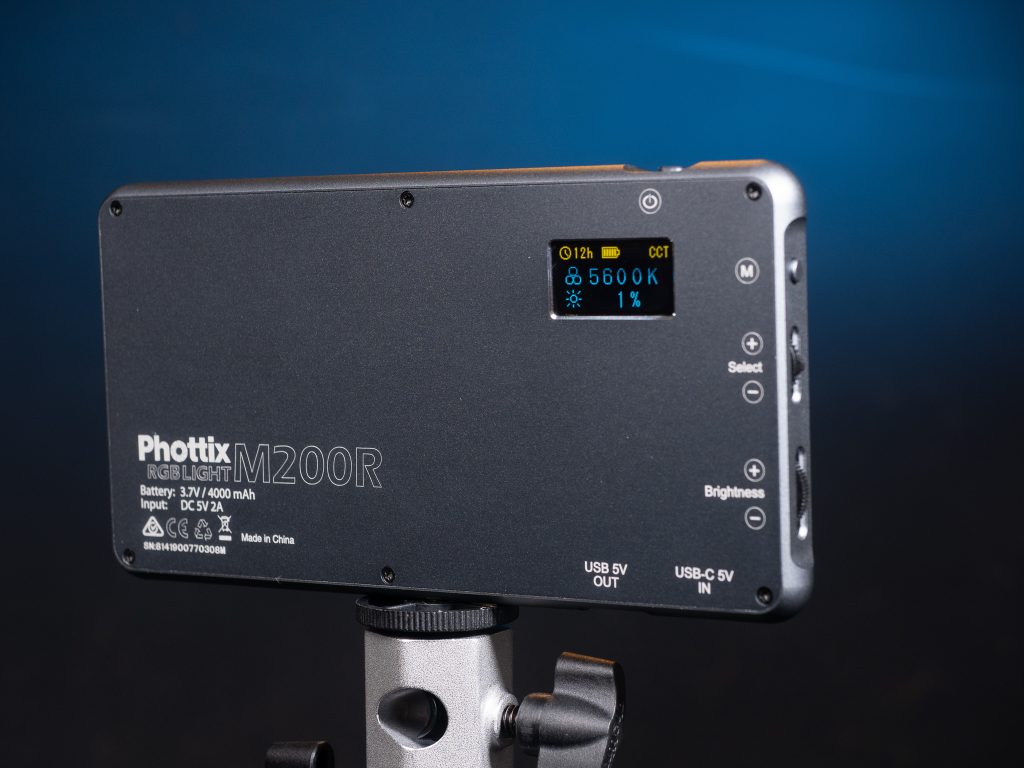
The controls are along one edge, and easily identified, with the power switch on the top.
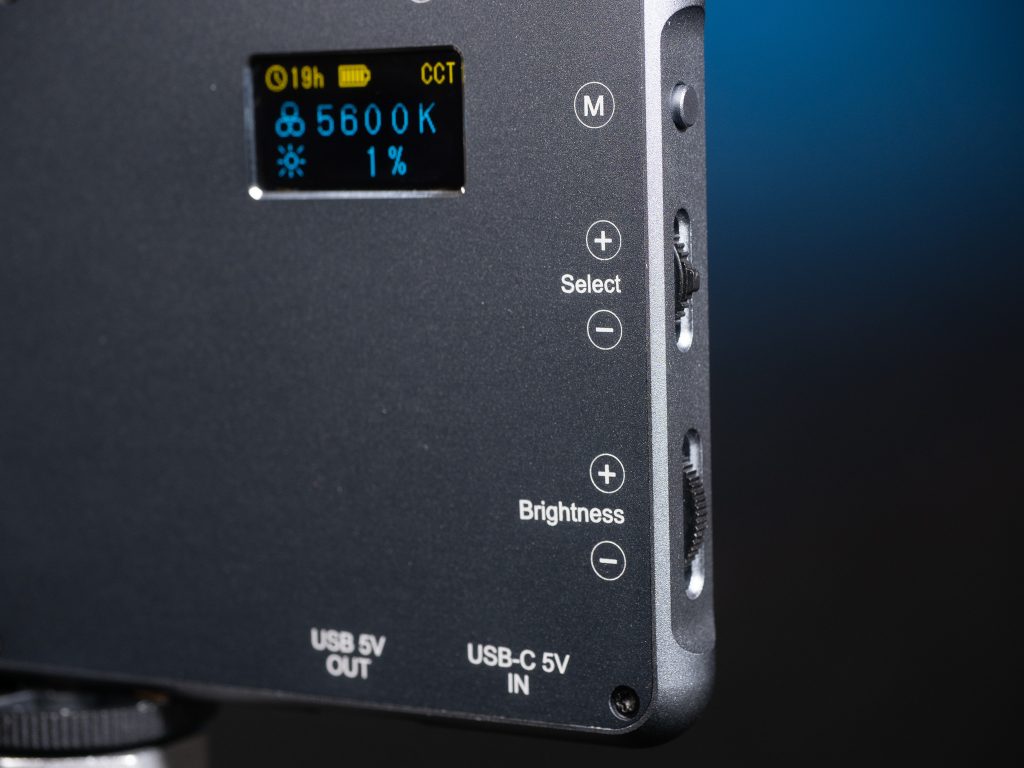
Down the right side, (viewed from the back), top to bottom, you have the mode button, followed by the select/adjustment switch. Finally, at the bottom is the all important brightness dial.

The display is quite small, but very clear and easy to understand. It provides information on estimated time remaining, battery capacity, colour temperature, brightness etc.Pressing the mode button allows you to choose between CCT, HSI and Effects.
The default mode is CCT which is very straightforward to use and adjust. Brightness dial does exactly that, and the set/adjust switch allows you to adjust the colour temperature between 3200K and 5600K. That’s pretty much it, and this is the mode that I make use of.
In HSI mode, press the select/adjust switch to select between H (hue) and S (saturation). Once done, you turn the same switch to select the desired colour hue from 0 to 360°. Or the desired colour saturation from 0 to 100.
In Effects mode, press the select/adjustment switch to select from the range of effects. There are 21 in total, including flash, candle, police, strobe lights, chase, fireworks and club. Turning the select/adjustment switch will then allow you to choose from three variations of each effect.
The effects are obviously aimed at video users, and I can see them being very useful.
The unit is charged via USB-C socket, which is pretty universal nowadays, and means it can even be charged from a USB3 port on a laptop if you’re stuck.
There’s a second USB socket, allowing you to use the M200R as a power bank, and charge other devices. This feature meant I really had no valid argument against taking it everywhere in my camera bag. It simply replaced my ageing power bank. Bonus!
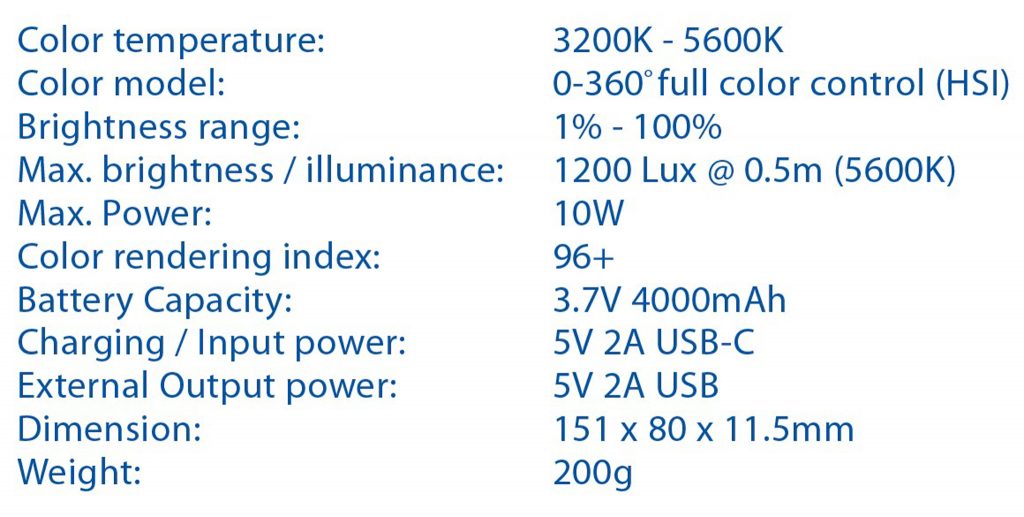
Specifications
In Use
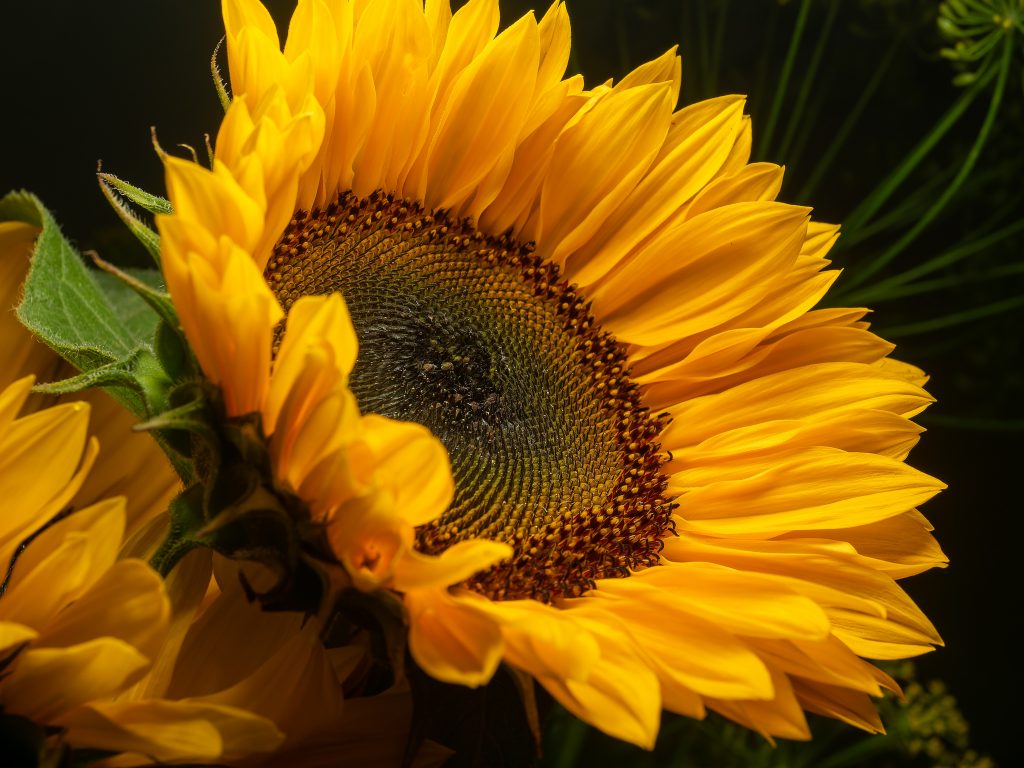
Macro isn’t something I pursue, although I did enjoy the challenge in my youth. The M200R was small enough that I could handhod the camera in one hand, and move the led panel to the required position without effort. What I particularly like is the ability to see exactly the effect the light is having on your subject, and make changes according, before taking the first shot.
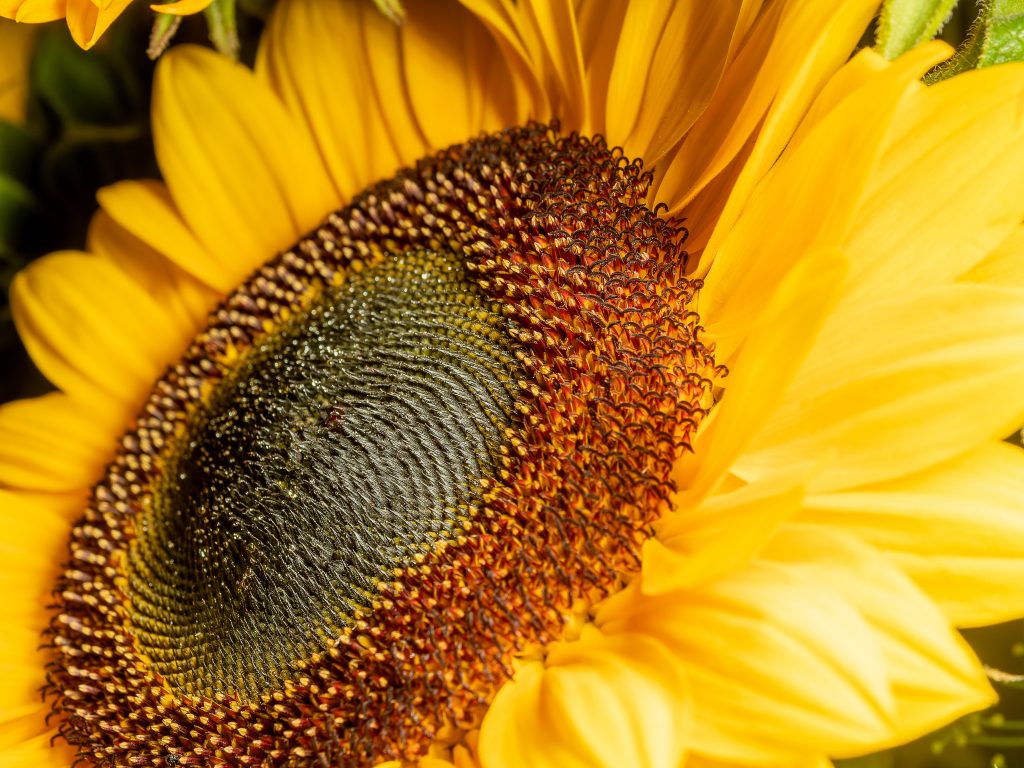
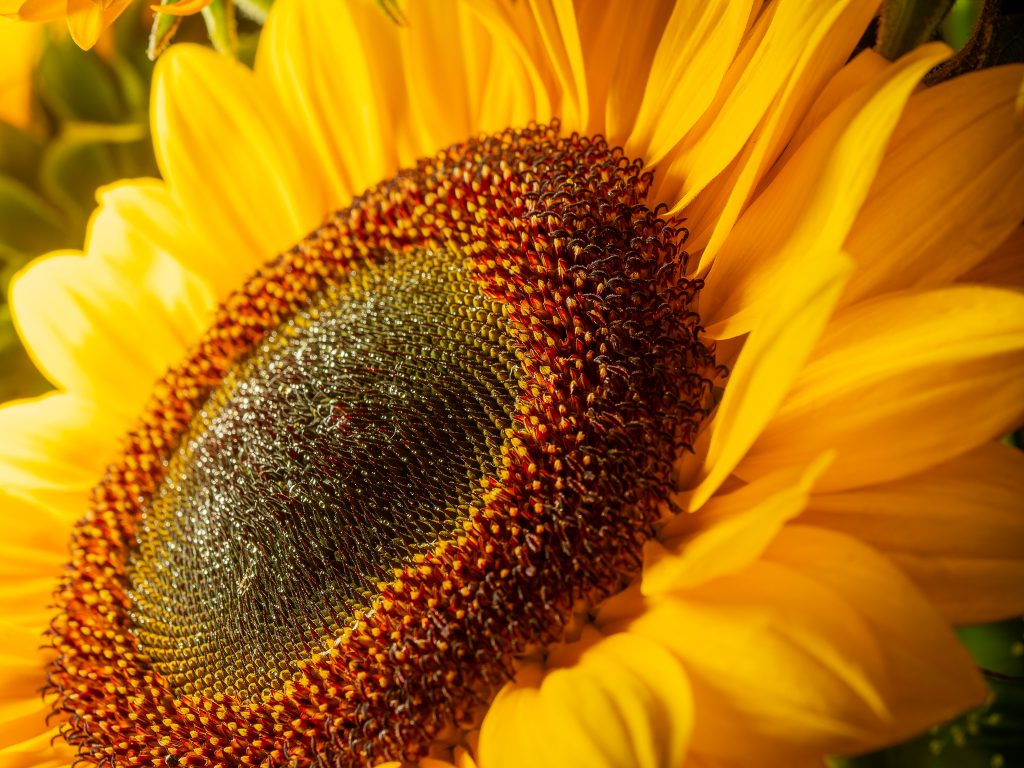
These two images just demonstrate how easy it was to see the difference in positioning the light. The difference in shadows and detail were quite pronounced, and allowed me to basically preview the best lighting option prior to taking the shot. Well, I obviously took the image for the purpose of this review, but you know what I mean.
Yep, this really is awful. It’s taken with the M200R in standard “on camera” position, as used by a lot of photographer with speedlights. However, it got me thinking. I had the camera on a tripod, and then took the following images:
These are simply exported, as is, from Lightroom. Allowing you to see the three images I took. Whilst in lightroom, I treated the three frames as if it were a HDR bracketed sequence, and used them to create a HDR final image.
This is a far more pleasing final image, and also gives the impression of three light sources. Whereas in truth, I simply took three images with the M200R in different postions, and distances from the subject. This effectively gave me two accent lights and a key, so to speak.
Okay, so it may be quicker with three lights, but not necessarily so. There was no setting up of light stands, heads and modifiers. No tinkering with light output from three sources and no light checks. The three initial images were taken in less than a minute, and processing was neither here nor there. Something to think about.
Conclusion
As you are aware from my opening statement, my perception of constant light sources has changed somewhat, and the likes of this particular led panel has only served to endorse my new view.
The M200R is particularly portable, with a wide range of uses, even in still photography. It’s small, very well appointed and with an extremely good battery life. I don’t necessarily reach for it in the first instance, but I’ve used it far more often than I originally thought I would. As an example, it made a nice, quick lighting solution for a food shoot that was sprung on me out of the blue. Particularly given the fact that it wasn’t part of the brief.
My wife is increasingly using her phone (or my phone, for that matter), to create behind the scenes videos of the dancers she shoots. The slightly larger led panels have certainly helped there, and I think more photographers may also follow suit.
This particular led panel came from The Flash Centre.