Review Phottix Raja 65cm
I’ve used the Phottix Raja range of softboxes for quite a few years, and found their quality to be outstanding. So when I was looking for a smaller alternative to my Phottix Raja 105cm, I took a look at the Raja 65. Well, to be fair, I prevaricated over buying it about three years ago, when I went on a bit of spending spree and bought a couple of Raja strips, the Raja 105, the deep 80 and the Raja 150. Basically, I didn’t have the bottle to tell Helen I wanted a sixth ‘box as well.
Anyway, a good few years have passed, and Helen mentioned wanting the new Elinchrom One for the mobile studio. Sauce for goose yadda yadda yadda, so I bought the Raja 65.
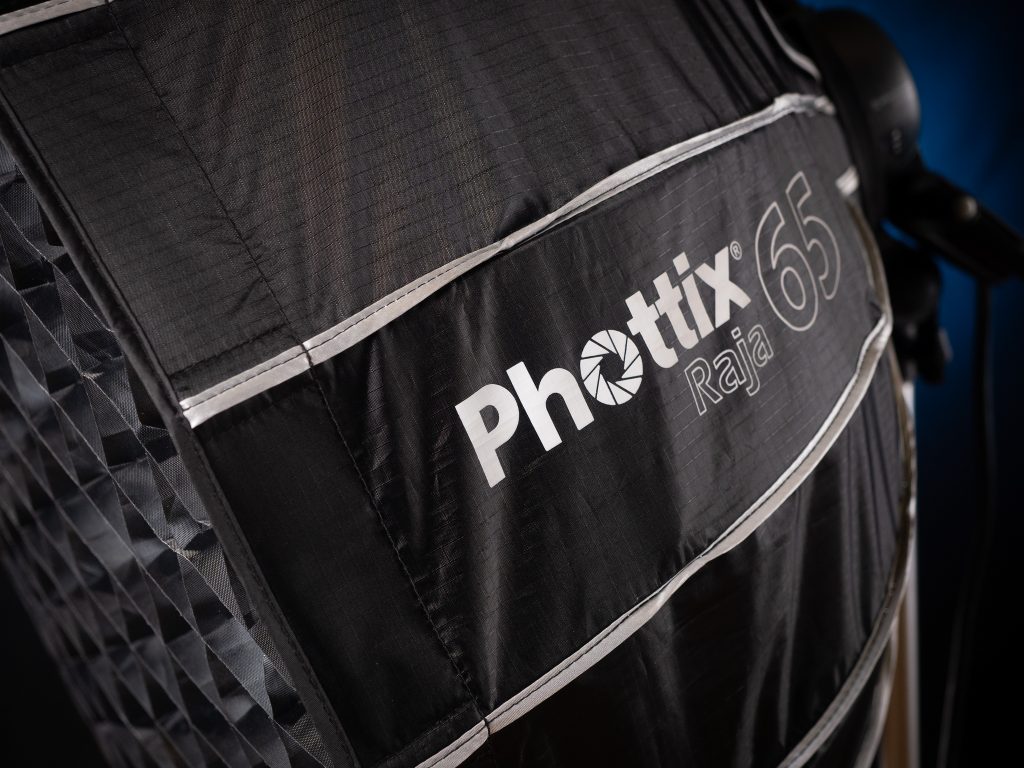
It had the same quality double walled and padded case, along with the modifier type and size emblazoned along the outside of the case. I’ve said it before, and I’ll say it again. Having the modifier type and size in large letters on the case can save a lot of time when rooting through a couple of dozen packed modifiers.
Erecting the Raja 65 is a little fiddlier than the strip boxes, as the central rod is quite short, and you have to push the locking ball down quite far before it engages with the shaft. And of course, the more you push down, the greater the tension. To be honest, after you’ve done it a few times, you tend to figure out the best technique to line it up and then simply lean in. The ball locks into place with a good satisfying click. And yes, it’s a much larger locking mechanism, with a rather large and easy to locate lock release button. So much easier than the traditional umbrella locking “blade”.

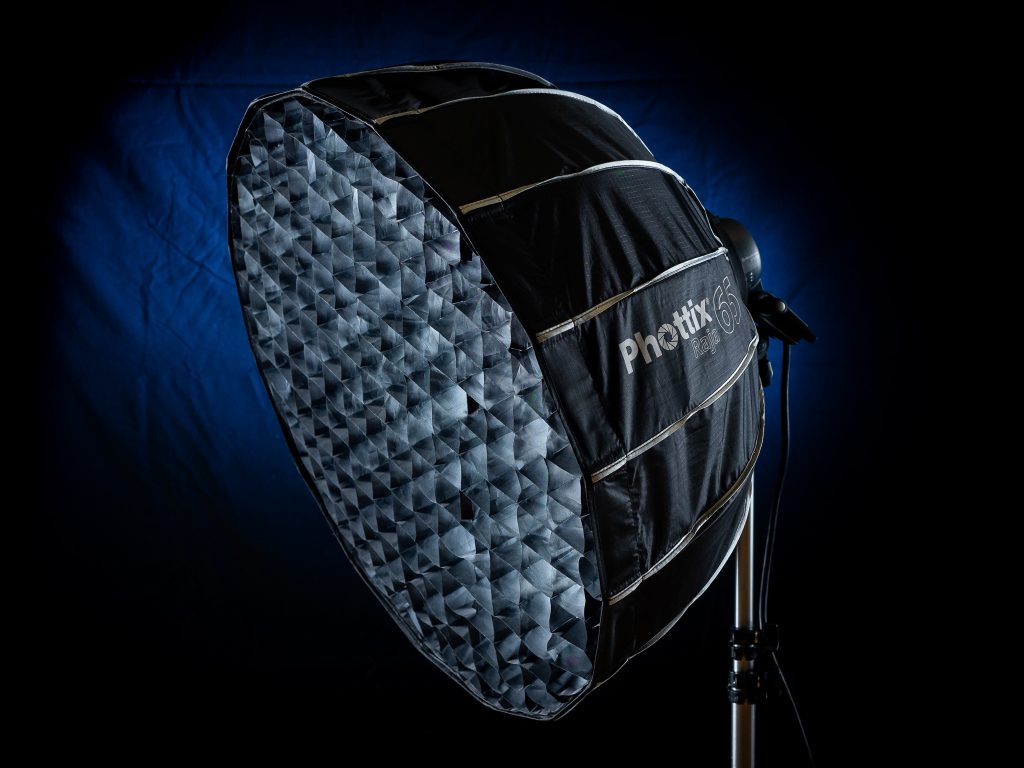
Almost all the Phottix Raja softboxes are supplied with a honeycomb, and like everything else about these softboxes, the quality is right up there. The honeycomb for the 65 is the same material and quality as those supplied with my other softboxes. All my Phottix boxes are used regularly, and it tends to be on location, so they are certainly knocked about a bit. But not one of the honeycombs have started to fray or lose their stitching or shape, which is quite something.
Like the other Phottix softboxes, the front diffusion panel is a dead fit, which aids in the rigidity of the box, although I doubt the Raja 65 has any real movement when erect, due to it’s size and the tension of the frame when locked in place. The fabric itself is of a good density, providing a really nice diffused light across the subject.
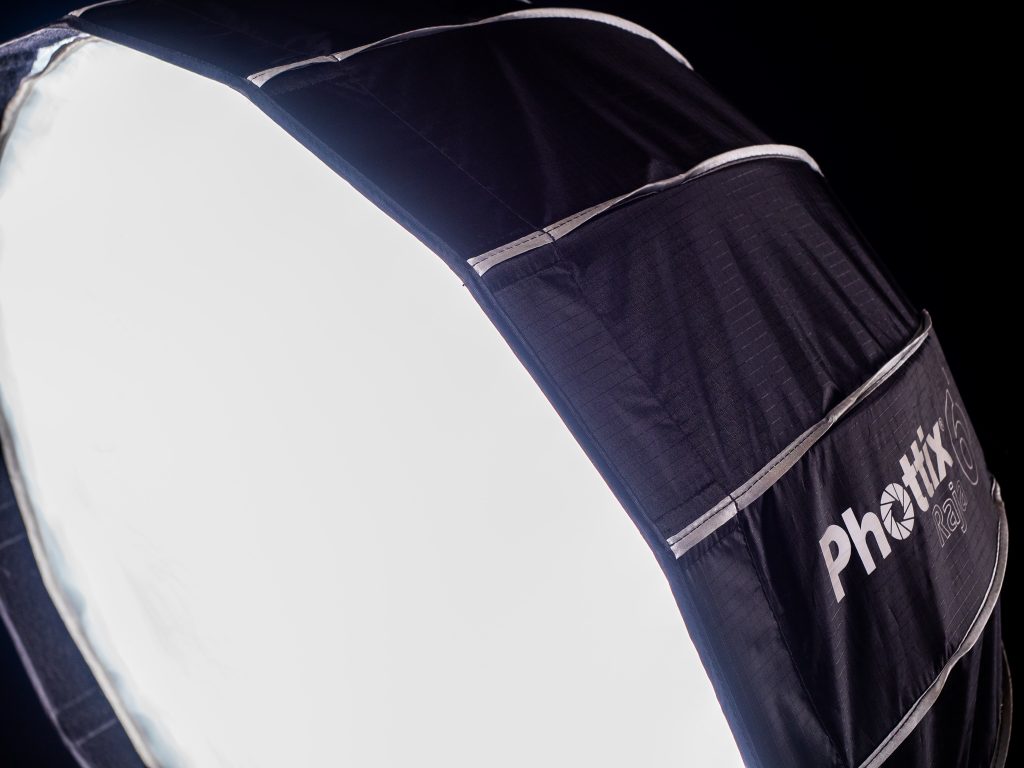
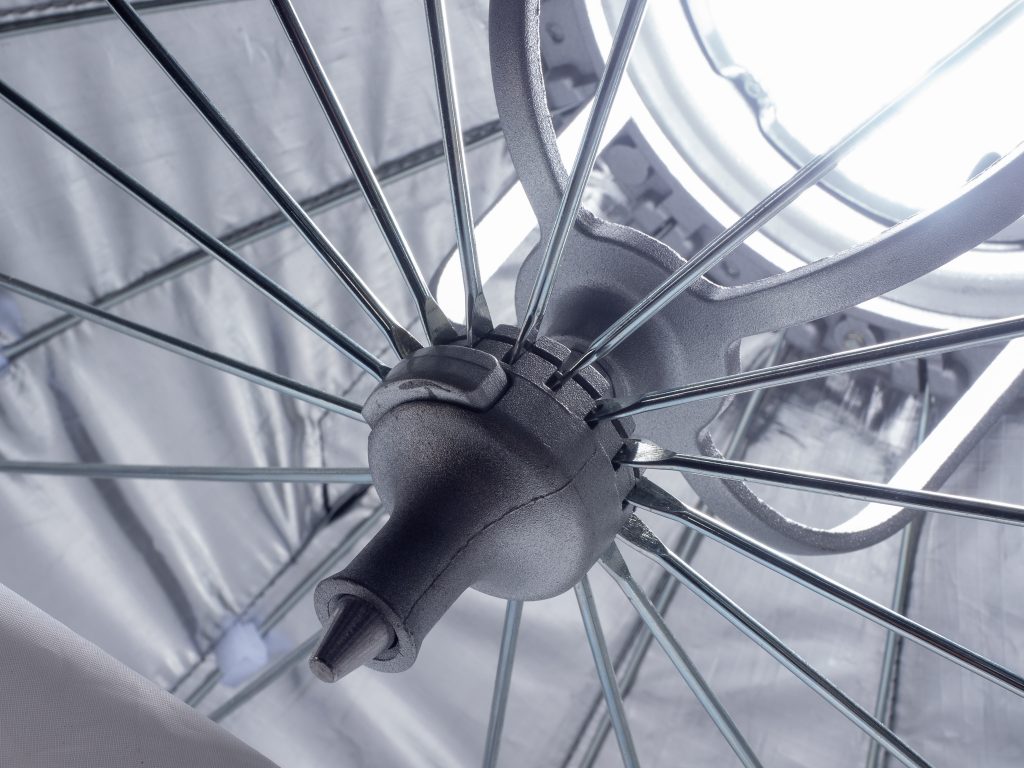
The inner diffusion panel has a central double density disc, which helps avoid that hotspot sometimes seen in reflections. Again, it fits extremely well, with only a small gap around the edges. It’s anchored in place with sixteen small hook ‘n’ loop tabs.
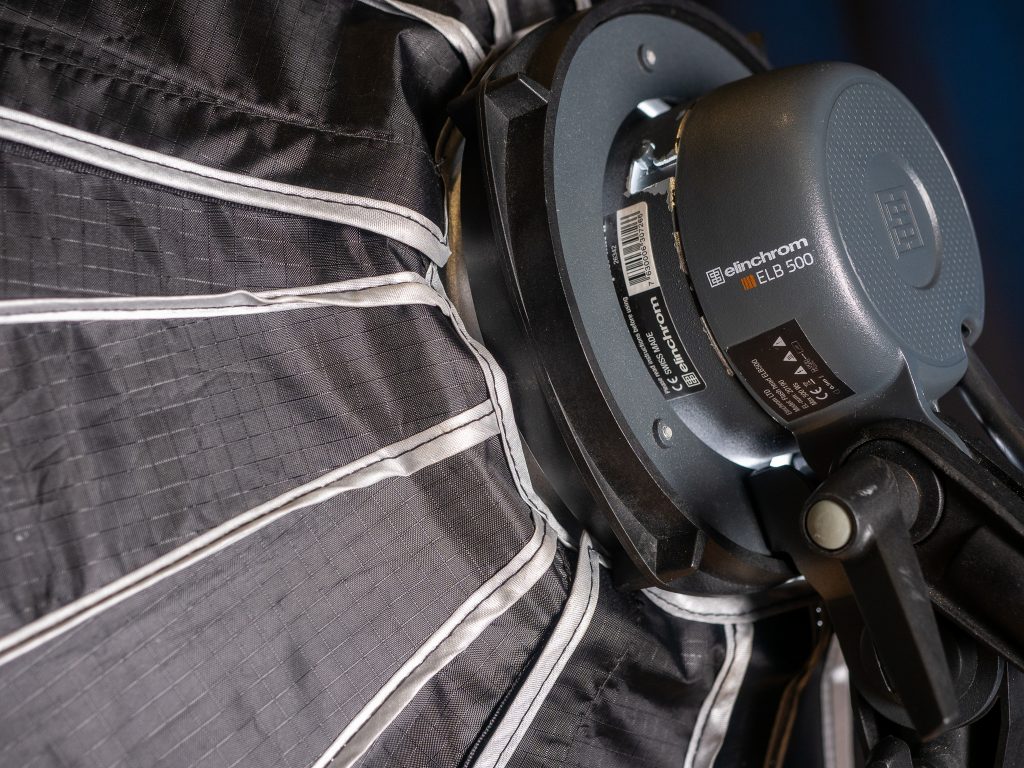
This the locking mechanism I mentioned earlier. As you can see, there is far more to get hold of, and the release button is certainly easy to locate, even in a dark environment. To be honest, no matter which side you approach the release mechanism, you simply need to take a hold of the whole thing, and squeeze!
Mind you, remember I was saying how short the locating rod is? Yeah, it really is.
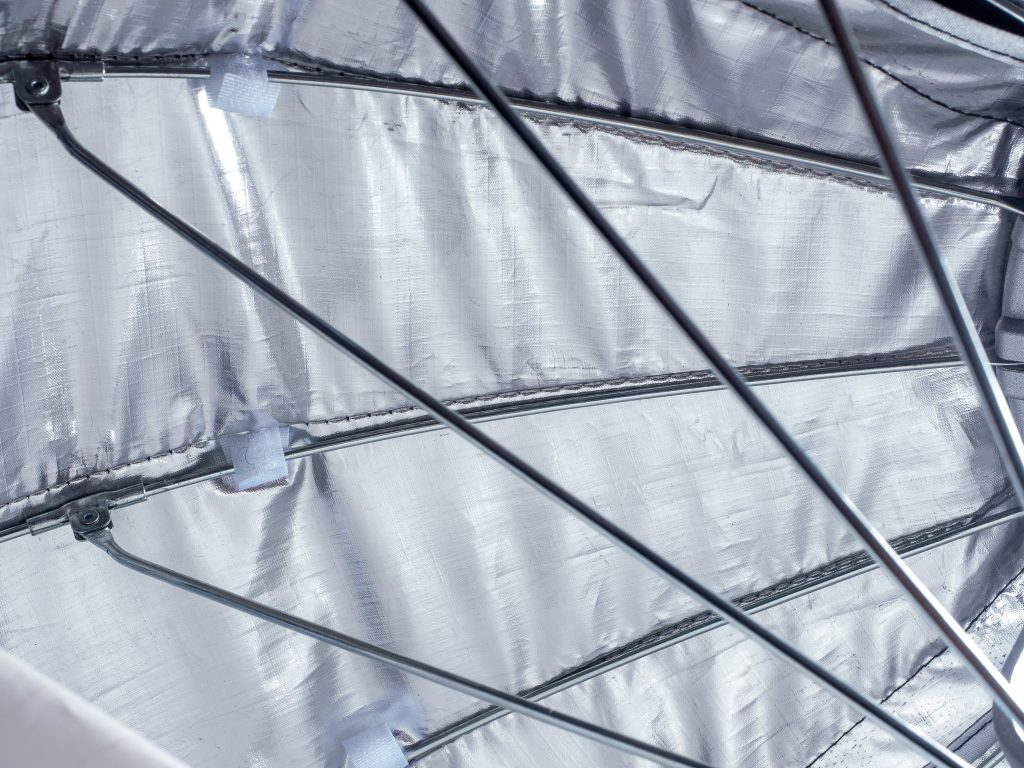
You can see the quality of the lining in this image. The highly reflective silver provides a very efficient light output, with a nice contrast too. You can also see the loop tabs that the internal diffusion panel fixes to, alongside each of the sixteen ribs.
One of the most important points, and it’s often overlooked by a lot of the softbox manufacturers, is the fitting of the panels around the light mount. All my Phottix softboxes have a very taught fit around the light mount, which ensures the skin of the box doesn’t slide down the collapsed ribs as it’s pushed into the case. There’s nothing more irritating than pulling a ‘box from a case to find the skin left behind, or in a gathered mess at the end of the ribs. It all adds to the setup time and pressure when trying to quickly set up on location.
Mind you, no matter how good a softbox looks, or how easy it is to deploy, it’s all for naught if it doesn’t create the imagery we are after. I wanted the 65 for it’s size, both packed and in use. I felt it would be great for some of the smaller products, where the 105 would be overkill, and the 150 just sheer lunacy!
Ultra simple product shot. ELB500 firing through the 65. Placed high and towards the camera, so as give a softer feel to the image. Similar to the FDL (Focused Diffused Lighting) Technique used in automotive work. The honeycomb was used so as to avoid any potential flare, although the height of the box should really have negated that. However, the honeycomb was also crucial to avoid any light bounce from the nearby wall, which would reduce the effect of the directional light. The output was set to 0.1 (Effectively 7Ws) and the camera settings were 1/250th sec ISO200 f5.6
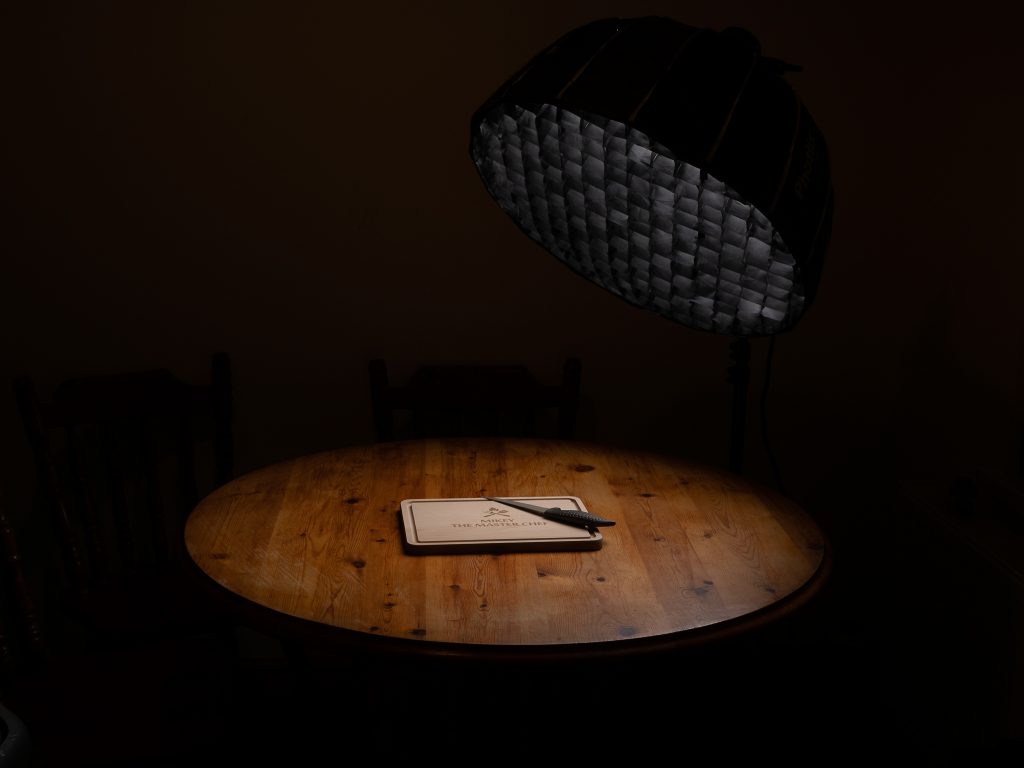
This is the pull back, showing the pooling of the light on the table only
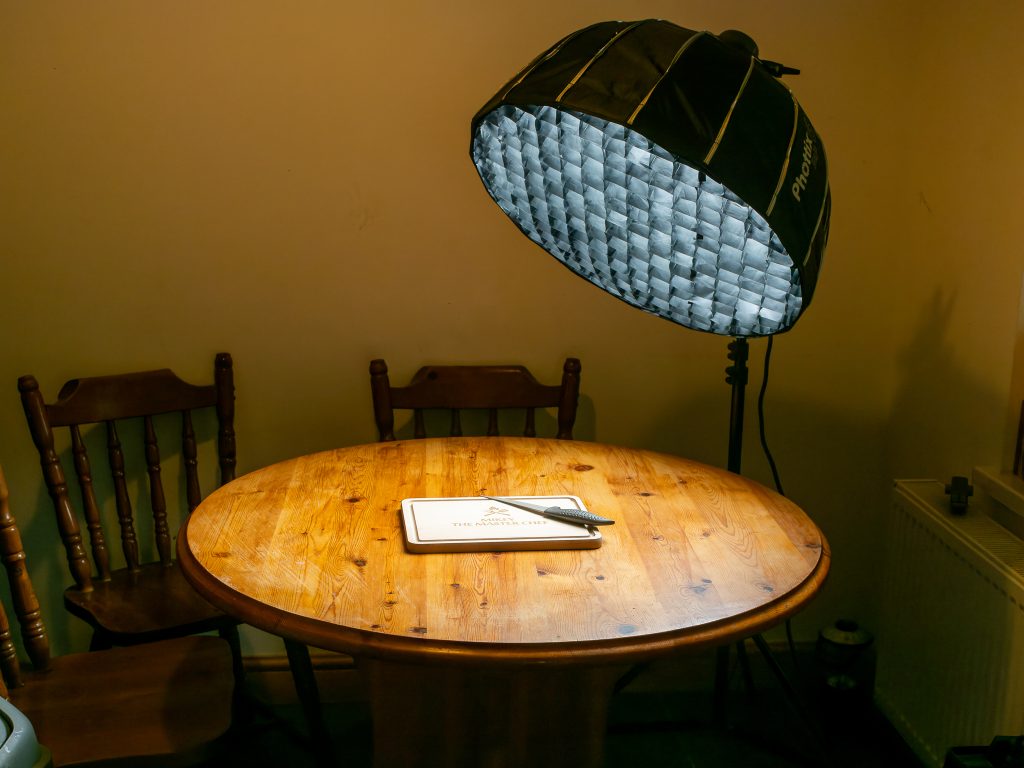
And this is the same pull back image, with the exposure pulled up by quite a few stops in post, to show the surrounding environment, and just how close that wall is.
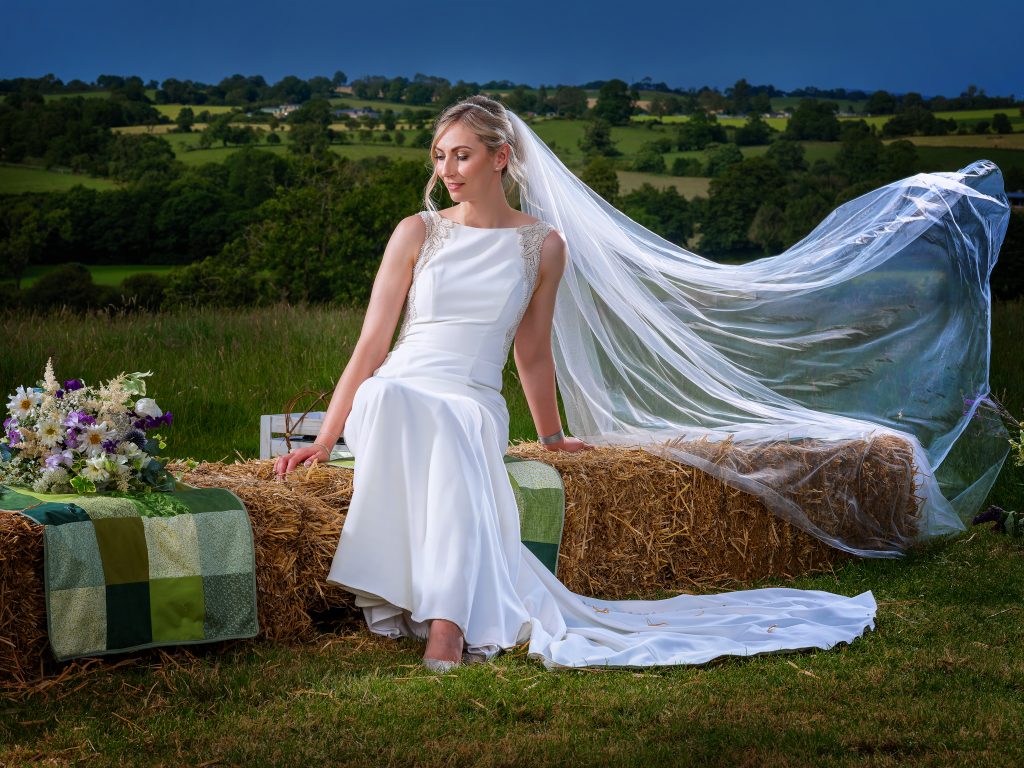
Everyone likes a good wedding, and this one was no exception. We were basically in a field alongside a very stylish marquis, with a bit of a breeze going on. Rather than use the stripboxes and 105, which tends to be my standard go to kit for the bridal portrait session, I decided to opt for the Raja 65 for the keylight, but without the honeycomb. I also made use of the ELB standard 18cm reflectors for my accent lighting, replacing the stripboxes.
The spread of light from the Raja 65 was excellent, and gave a nice gentle fill across our bride. The accent light frame left was just out of frame and set to an output of 4.0 (Equivalent to 100Ws), which emulated our sun. The accent light frame right was set to an output of 5.0 (Equivalent to 200Ws) due to the greater distance from Christina.
The keylight (Raja 65) was also firing at an output of 5.0 (Equivalent to 200Ws)
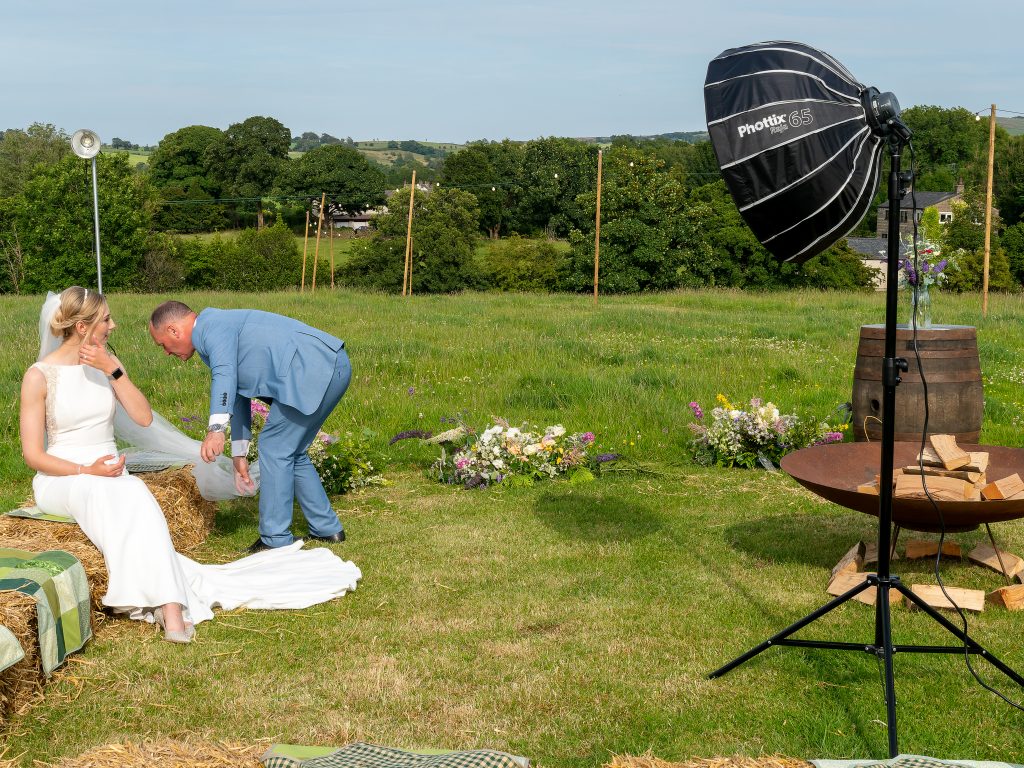
This is the BTS of the preparation for the previous image. That’s a new suit, by the way.

And one more from the session.
Conclusion
The quality and value for money simply cannot be emphasised enough. My older Phottix softboxes have been through an awful lot of use by both Helen and I, and tend to be used almost daily. They are still as good as new, and have outlasted several of my other softboxes.
Whilst the Raja 65 is a little more of a struggle to erect, I certainly found it became easier after a bit of practice. What I do like is the fact the 65 is completely rigid once deployed. Even in a strong breeze, there is no movement in the box itself.
The design of the box, along with the highly reflective silver lining, makes for an extremely light efficient modifier. Talking of which, here are the statistics.
Light loss in stops:
Inner diffuser only : +0.3
Inner & outer diffuser : -1.3
Grid only : -0.1
1x diffuser and grid : -0.4
2x diffusers and grid : -2.0
To be honest, I bought the 65 for use on small products on location. I hadn’t expected to make use of it during a wedding bridal portrait session, but it stepped up to the plate and more than delivered. I think I’m going to be making far more use of this little box than I anticipated.