Review Elinchrom Five
Following the launch of the Elinchrom One, Elinchrom hinted at something bigger on the horizon. Ladies and Gentlemen, meet the Five.
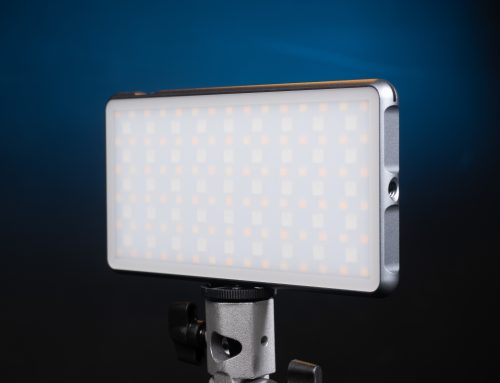
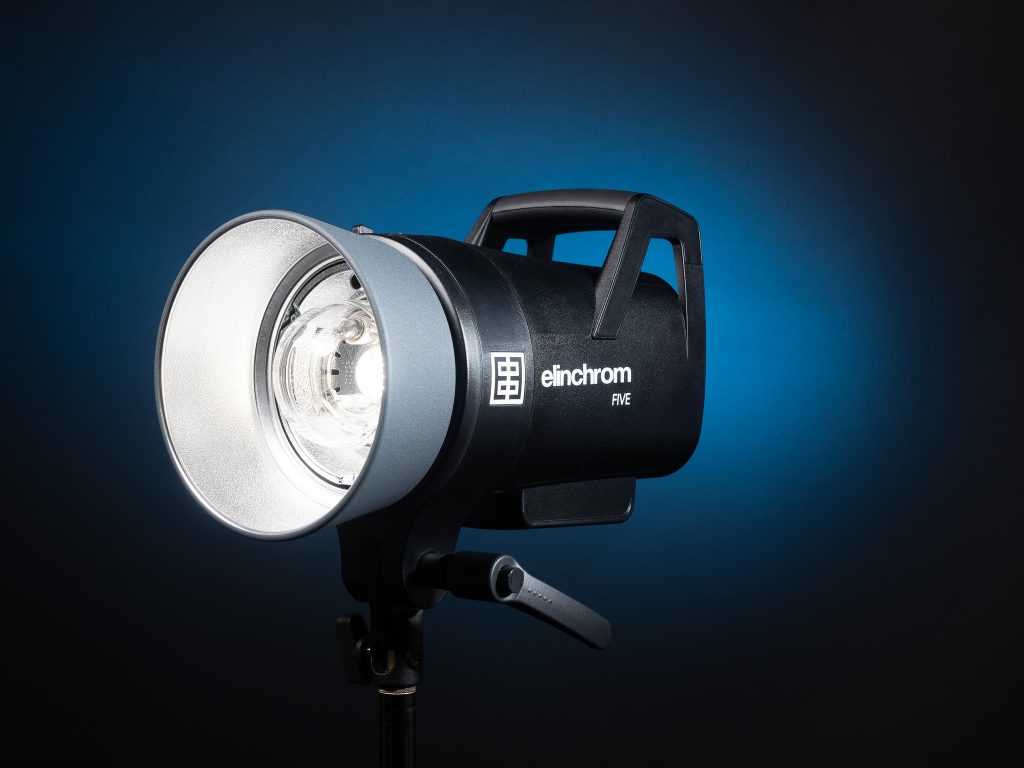
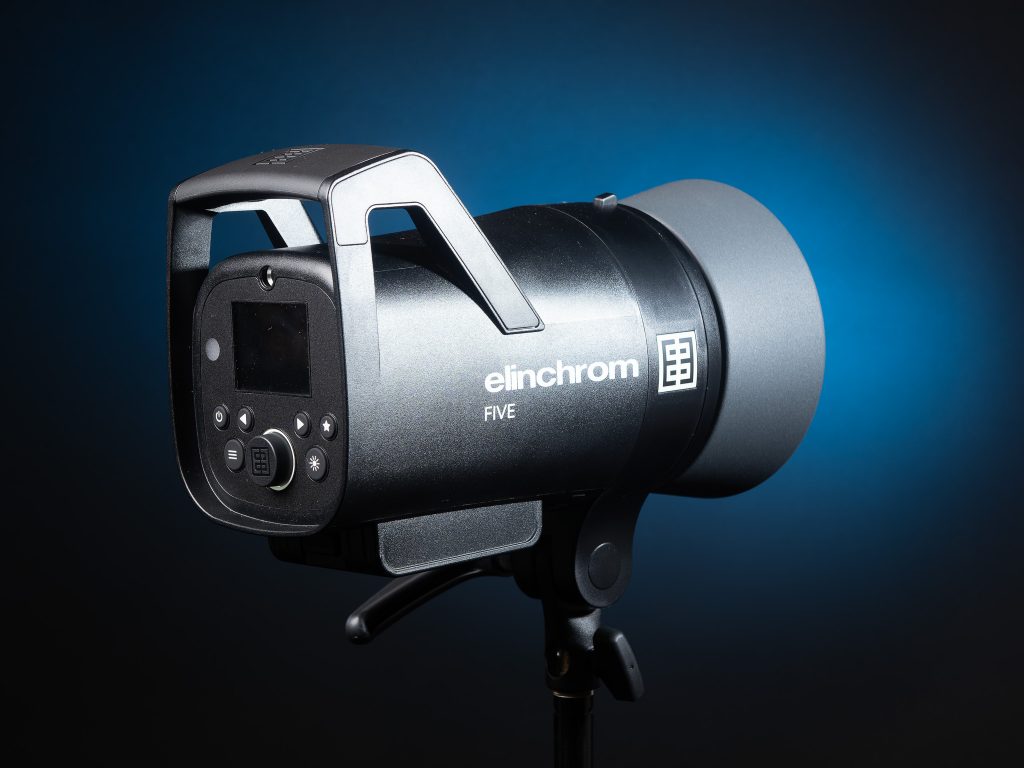
At first glance, it looked very, very familiar. The case certainly looked like the ELC 500 and the Pro HD version, and the rear layout is identical to the ELC 500. The only visible difference is the battery block underneath.
So I turned it around, and then upside down. Where’s the charge point? I removed the battery and found it on one edge, along with a handy battery condition led indicator. As I was about to push the battery back home, I found another charge point on the body, just alongside the seat for the battery.
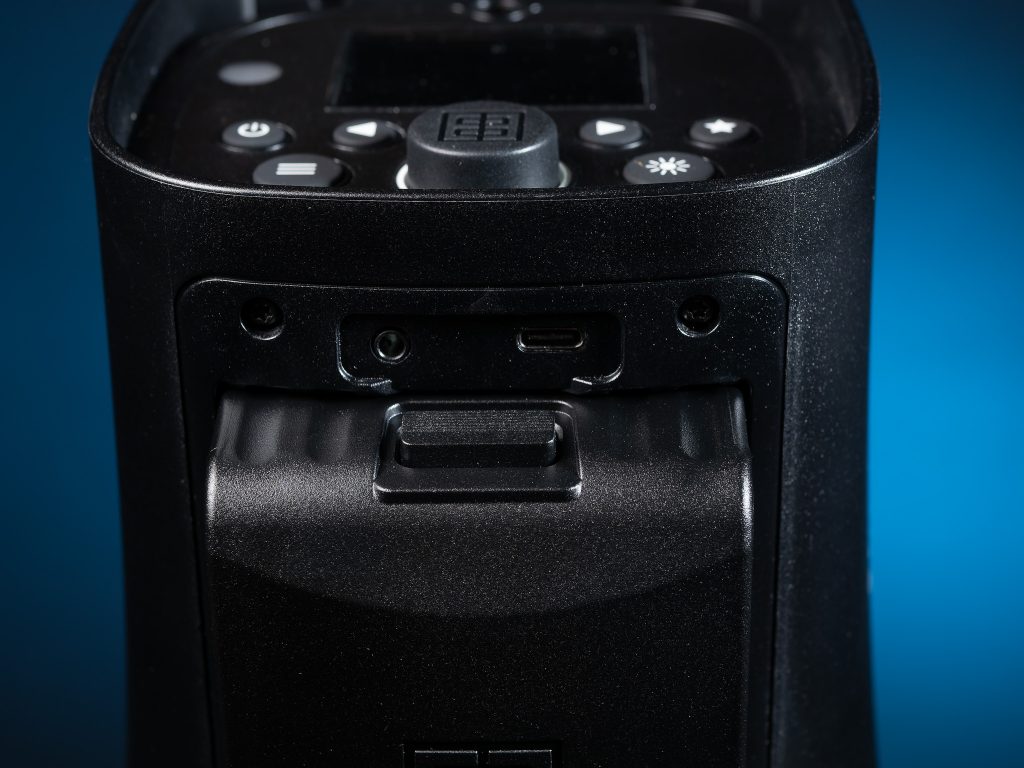
Adjacent to the charge point, is a 3.5mm sync port. The charge port is a USB C socket, which did raise an eyebrow or two at the workshops, with a few people commenting they constantly had issues with phones that make use of USB C, as it will readily come unplugged, or drop the charge. I found the USB C lead needed a firm push home, which was confirmed by a very tangible click. And if you are worried about the lead pulling out, simply loop the velcro lead strap through the handle and secure it. That lead isn’t going anywhere!
Charging the battery off unit takes 2hr 35mins from flat to full. Charging with the battery in situ knocks an hour off that, at 1hr 35mins due to the active charging. Charging can continue whilst the unit is in use, and that includes out on location with use of charger blocks/battery packs.
The rear panel is familiar if you have used any of the recent lights, such as the ELB 500, One, ELC 500 or ELB 1200 etc. The menu button to the left activates the menu, and then rotate the central dial to find the function you’re after. Push the same large button selects it, and then rotate to select the sub item etc. Very familiar, but also extremely intuitive if you have never used one of the more recent Elinchrom heads. It’s very quick to use. The left and right buttons are also used in menu navigation, and also double up to increase or decrease the power output by a full stop.
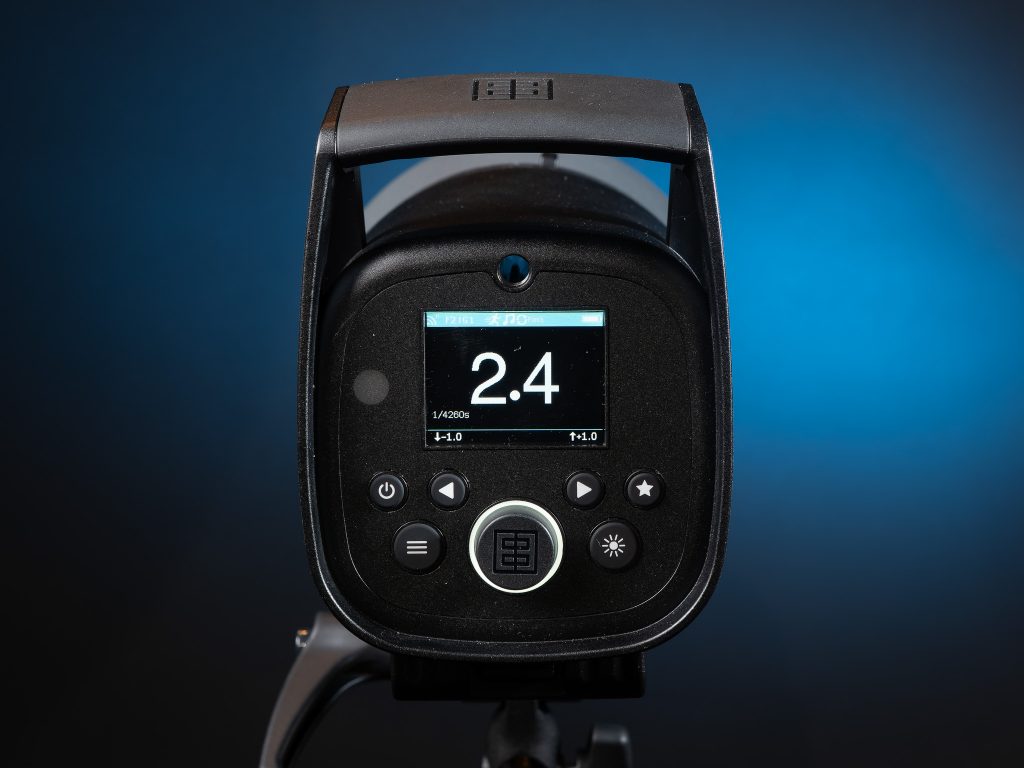
One of the menu items I found interesting, is the fact you can choose how the power output is displayed. You can use the Elinchrom scale (obviously!), fractions (1/1, 1/2 etc), or choose to use watt seconds (522Ws, 400Ws etc). I stayed with the Elinchrom scale, because it’s the one I’m familiar with, but I felt the choice was a nice touch.
The circle to the left of the display panel is the photocell.
The colour at the top of the menu denotes the group setting.
Blue = Group 1
Orange = Group 2
Red = Group 3
Green = Group 4
To be honest, I find the colours for 1 and 4 to be a little too similar. But that’s probably just me. The logo on the side of the head can be set to display the group colour, which can make it far easier to identify heads in a busy studio environment.

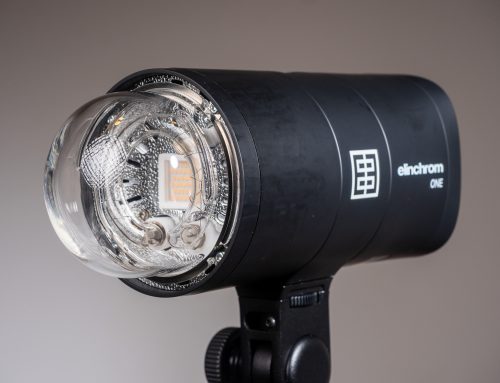
This is the business end. The bulb is protected by a toughened glass dome, with an led modelling bulb at the back. The modelling bulb has it’s own button to activate it, making it much easier than some of the older heads. Press and hold the modelling button will bring up the modelling bulb menu, allowing you to change the brightness from a minimum of 2.3 up to a maximum of 6.3. And yes, 6.3 is incredibly bright at 64w/4000lm. It can also be set to proportional, which will set the power value in relation to the power output set for the head. You can also choose to turn on visual flash confirmation, which means the modelling light extinguishes following a flash, and re-illuminates once the head is fully charged and ready to go.
The modelling bulb colour temperature range is from 2700k to 6500k via preset values.
TTL and HSS can be used with the Skyport Pro triggers. If you are using it in TTL and switch to manual, the head retains the last setting from the TTL shot, which I’ve found to be extremely useful. Whilst I don’t really use TTL, I’ve previously switched to TTL to take a single shot, which has then put the power settings for the heads in the “ball park”, and I’ve been able to make quick adjustments to get the image exactly as I want it. Very, very useful when you have a matter of minutes to get a very quick shot. Worse case scenario, I have the TTL image in the bag if the available time expires, or the scene changes before I can make the manual adjustment.
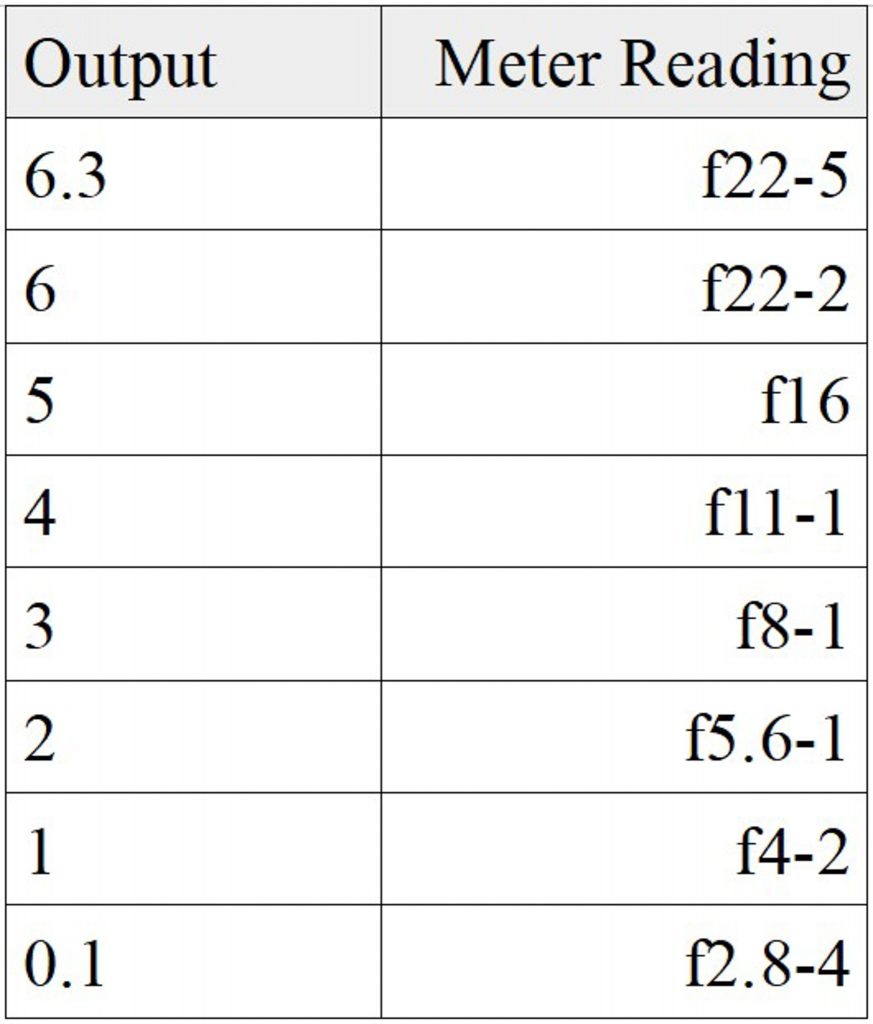
The Elinchrom Five was fitted with a standard 18cm reflector, and the lightmeter was at a distance of 175cm from the bulb. I’d set the lightmeter sensitivity to ISO100.
In Use
As I mentioned at the top of this article, I had been asked to present workshops for the launch of the Elinchrom Five, which were to be held at The Flash Centre in Birmingham, London and Leeds. Initially, I should have had the heads early enough to make use of them on client shoots, but a delay in delivery meant I received them pretty much a few days before the first workshop in Birmingham. All three workshops had the same agenda, which was to introduce the head with a walkthrough of functions etc. This was then followed by three practical sessions : automotive, portrait and food.
The automotive section was to be a motorcycle brought into the studio, where I chose to tightly control the lighting to demonstrate how to isolate a subject from the surrounding area. The studios were compact, with a lot of equipment on the periphery. They’re within a sales centre after all.
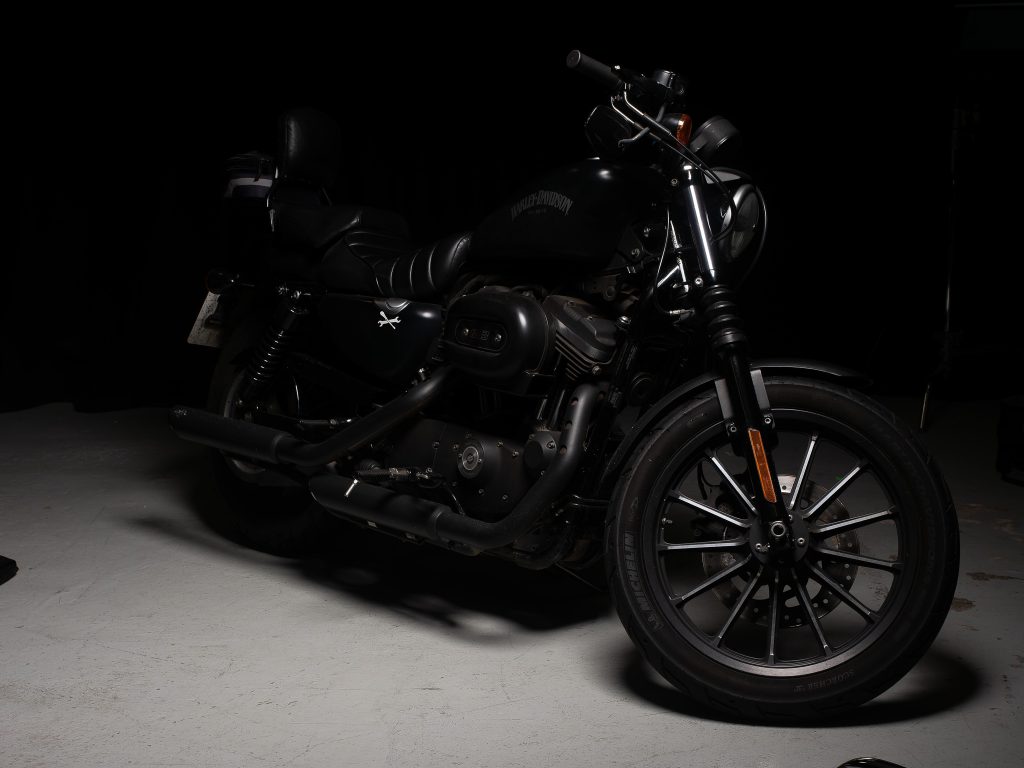
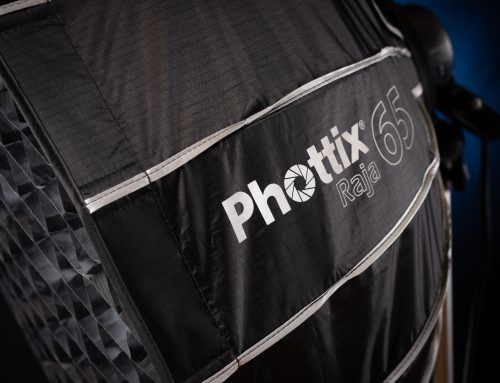
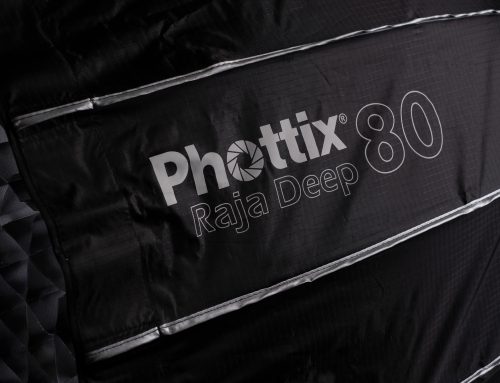
This is the image from placing the keylight, which is an Elinchrom Five firing through a Phottix Deep 80cm Hexa with a honeycomb in place. It was mounted on a boom arm above the bike, and just this side of it. It was set to fire at an output of 3.0 (Equivalent to 50Ws).
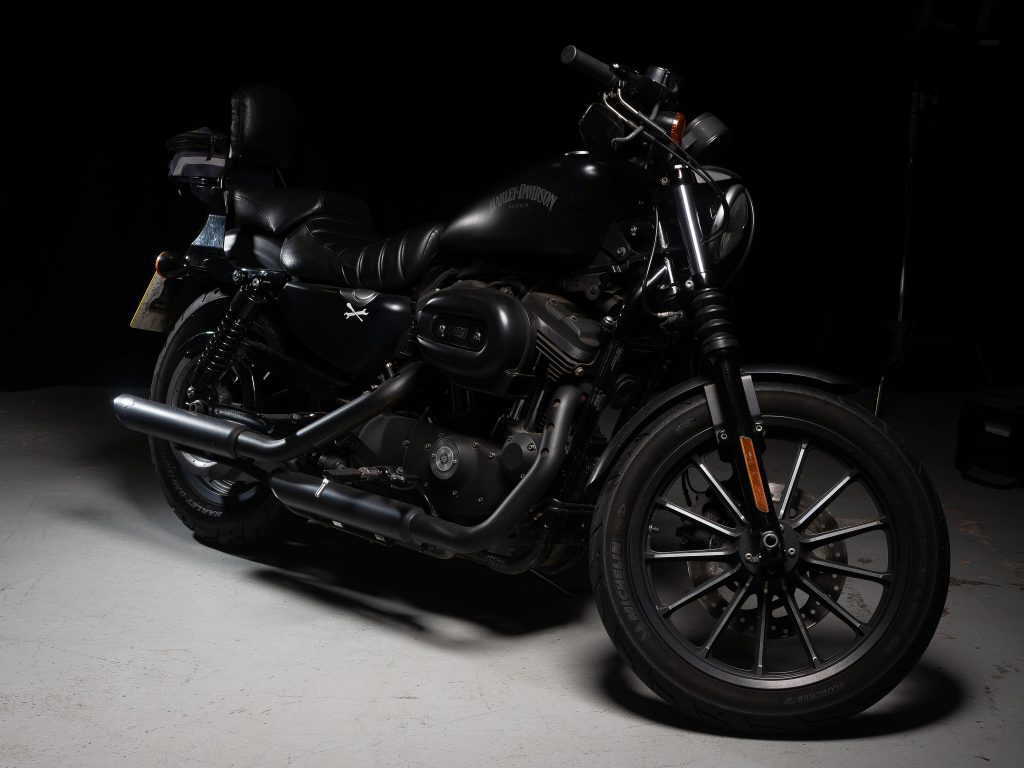
I then placed an accent light frame left. Another Elinchrom Five, firing through a standard 18cm reflector with a 30° grid fitted. It was set to cut across the bike, bringing up the detail on the rear tyre, the suspension and exhaust etc. The power output was set to 0.1 (Equivalent to 7Ws).
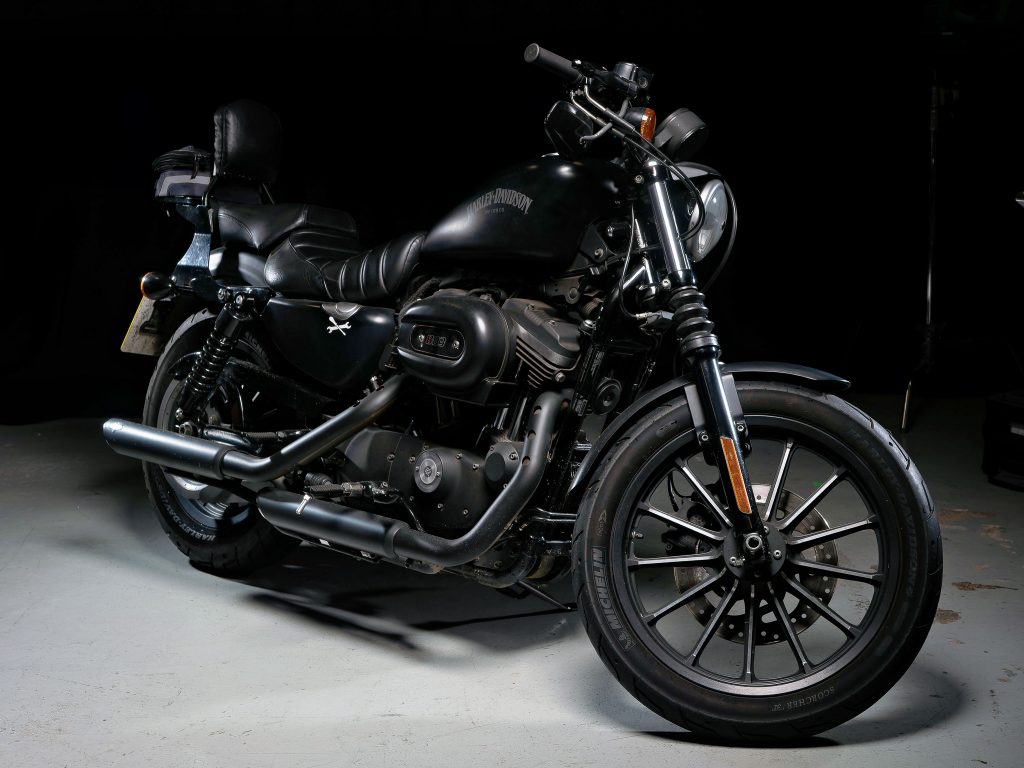
This image shows the affect of the third accent light added to the mix. It was placed frame right and beyond the bike, so as to come across the tyre and headlight. I initially had it quite high, which caused too much of a highlight on the headlamp and mudguard. It was a third Elinchrom Five, firing through another 18cm reflector with another 30° grid fitted. Again the output was set to 0.1 (Equivalent to 7Ws).
This is the final processed image, and is the bike from the London workshop.
Olympus E-M1 mkII 1/250th sec ISO200 12-40mm f2.8 @ f5.6
And this was the bike from the Birmingham workshop. Possibly my favourite, as it required very little work in post. (Not as much chrome clutter in the background!)
At the Leeds workshop, we ran into a little bit of an issue for the automotive section. We couldn’t get the bike into the studio. So the bike was set up in the middle of a rather busy industrial estate, at 11:00hrs. Again, my main concern was the background clutter, although this time it consisted of parked cars, courier vans, chaps in high viz vests and other stuff that kinda makes you screw your face up.
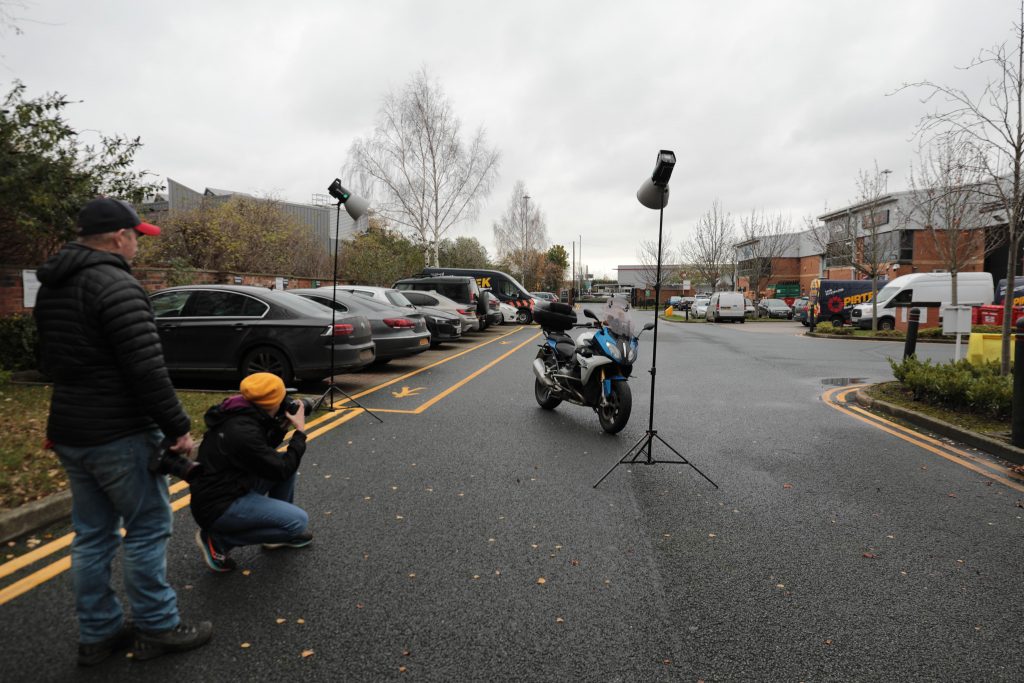
I placed the first Elinchrom Five frame right, firing at full power through a 26cm high intensity reflector and directed down towards the front of the bike. A second Elinchrom Five was placed frame left, again firing at full power through a 26cm high intensity reflector. This second light was aimed down towards the body of the bike. My intention was to provide a tight pool of light around the bike, and at such a level, that the ambient light could be easily overcome.
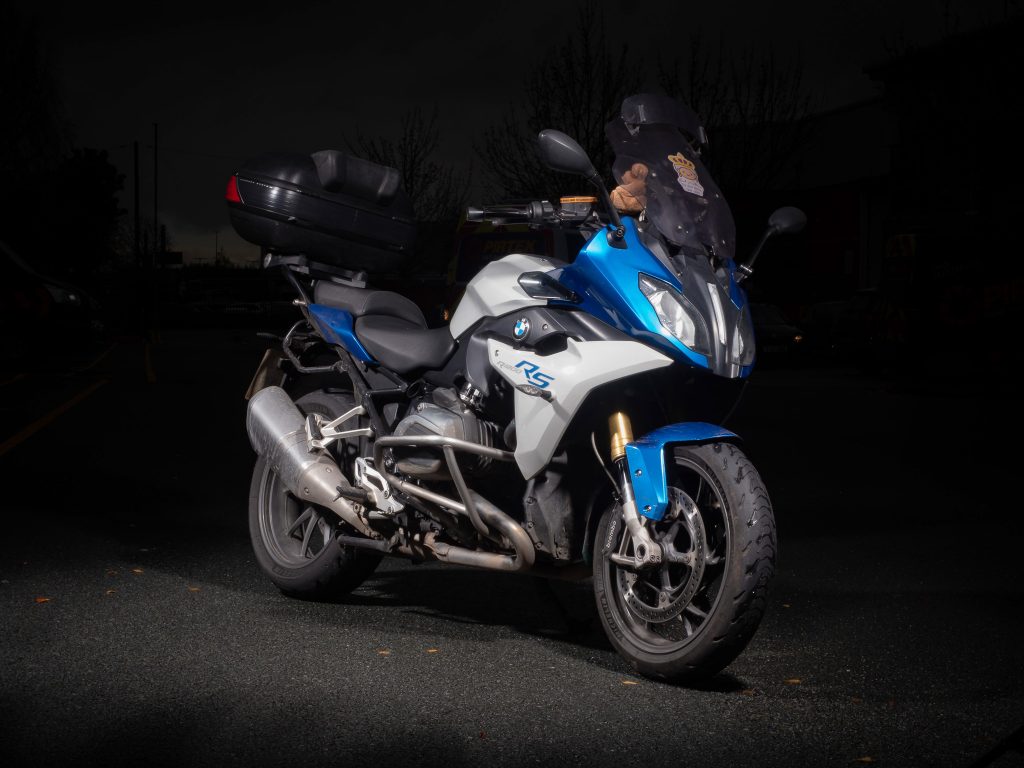
I set the camera, an Olympus E-M1 mkII, to a shutter speed of 1/250th sec, ISO 100 and an aperture of f16. This easily suppressed the ambient light, isolating the bike from the rather distracting background.
Following the automotive session, we moved on to portraits. We started with a very simple single light setup. I had an Elinchrom Five placed about seven feet high, angled downward and firing through a quickfold 80cm Octa. Output was set to 3.0 (Equivalent to 50Ws).
This was to demonstrate one of the techniques for mitigating the reflection of the lights within spectacles. The angle of incidence would mean the light striking the glasses would reflect well below the frame, and therefore not show the modifier as a white patch on the lenses. The camera settings were 1/320th sec ISO 200 and f8 on an Olympus E-M1 mkII. We made very subtle use of a reflector, so as not to lose detail under his chin, and also lift the far side of his face a little.

I then had a question asked, regarding hats, and whether a single light and reflector would cope to create a usable image.
The gentleman wore a baseball cap, and with the light at the same setting and using the same modifier, a reflector was held lower frame left, bouncing the light under his chin and also under the peak of the baseball cap. It also provided fill to the frame left side of his face. If you look carefully, you can make out the position of the reflector and keylight from the catchlights in his eyes.
Camera settings are Olympus E-M1 mkII 1/250th sec ISO 200 and f8
By substituting the reflector for a basic softbox and a second Elinchrom Five, we have full control over the amount of light we have available for fill. This is a very basic clamshell setup, with a high keylight, angled down towards our subject, and a second sofbox below, angled upward. This provides fill in a very controlled manner, and can give a very flattering look for the more mature client.
The key light is the same folding octa set to an output of 2.0 (equivalent to 25Ws), as it’s a little nearer our subject. The lower head is set to an output of 1.0 (Equivalent to 12Ws).
And without the fill from the clamshell setup, we’ve managed to age our client by a good decade or two.
After a discussion regarding typical quick setups, I was asked for something a little more creative. I have discussed the history and uses of the Chiaroscuro setup before, and chose to create an example for the workshop attendees.
I made use of two Elinchrom Fives, with each firing through a Phottix 30cm x 140cm honeycombed stipbox. The keylight is frame right, and pretty much alongside me, firing at an output of 4.0 (Equivalent to 100Ws). The background is lit by the second head and stripbox stood fairly close to the background at around three feet and just out of frame. It was firing at an output of 3.0 (Equivalent to 50Ws).
Camera settings were Olympus E-M1 mkII 1/250th sec ISO 100 and f10
The last section was based around food photography, and we were provided with the obligatory slice of cheesecake and a few bits of fruit. As you do.

The key light is immediate frame left and pretty much alongside me. The Elinchrom Five was firing through a folding 80cm Octa at an output of 1.5 (Equivalent to 18Ws). It was about head height, and I was working beneath it. The accent light is the second Five, firing through an 18cm standard reflector, with a 30° grid fitted, helping to reduce the possibility of flare. It was at a similar height to the camera, and aiming downward towards the food. The output was set to minimum, at 0.1 (Equivalent to 7Ws), and the angle of incidence ensured that the light would reflect towards the camera, creating the specular highlights that would give it more texture and also make the dish appealing.
Camera settings were Olympus E-M1 mkII 1/125th sec ISO 200 and f5.6.

Julian had a change of heart for the last workshop in Leeds. He arrived with Macarons. The lighting was identical to the previous image.
That was pretty much the three workshops for the launch of the Elinchrom Five. And as is my usual trick, I wanted to make use of them on a client shoot. Helen had a number of competitions and dance school shoots lined up, and it seemed a good opportunity to put them through their paces in a pressured environment.
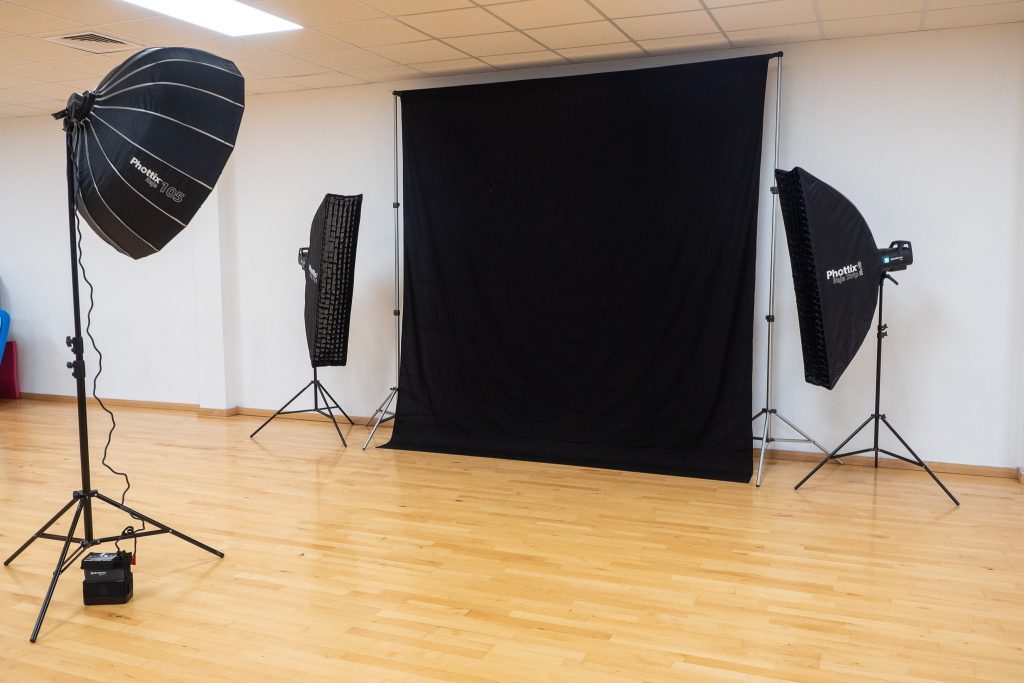
At the dance competitions, Helen shoots the competition itself, with action shots from the floor. Meanwhile, I run the mobile studio, providing prints onsite etc. The mobile studio is a fairly basic setup, with two accents and a key light, along with a 3m x 3m black backdrop. It’s the same setup we tend to use in the dance school shoots.
I used the two Fives I had as the accents, firing through a Phottix 30x140cm honeycombed stripbox. Their output was set to 4.0 (Equivalent to 100Ws), which is my general starting point. My keylight is a trusty ELB500, firing through a Phottox 105cm honeycombed hexa, and at an output of 3.0 (Equivalent to 50Ws). The above image was at a school shoot, and was a later shoot than the images below, which was in the mobile studio at a competition.
Interestingly, I found the accent lighting to be a little sharper/brighter than I would normally expect.
I turned the accent lights down slightly, to 3.5 (Equivalent to 75Ws), and it then seemed more familiar. To be fair, I also adjust the ELB500 accents on occasion, as costumes can make quite a difference.

That got me thinking. I’d had a very similar puzzling moment whilst reviewing and field testing the Elinchrom One, and found that when it went head to head against the Godox AD200 Pro, the Elinchrom One was far more efficient with it’s light output.
I wonder…
So, I kinda mythered The Flash Centre to loan me a Godox AD600 Pro, and pitched it against the Elinchrom Five.
Each head was fitted with an 18cm standard reflector on a lightstand at a height of 1.3m, the same height as the lightmeter, which was at a distance of 175cm from the bulb of the tested head. The lightmeter was set to a sensitivity of ISO 100.
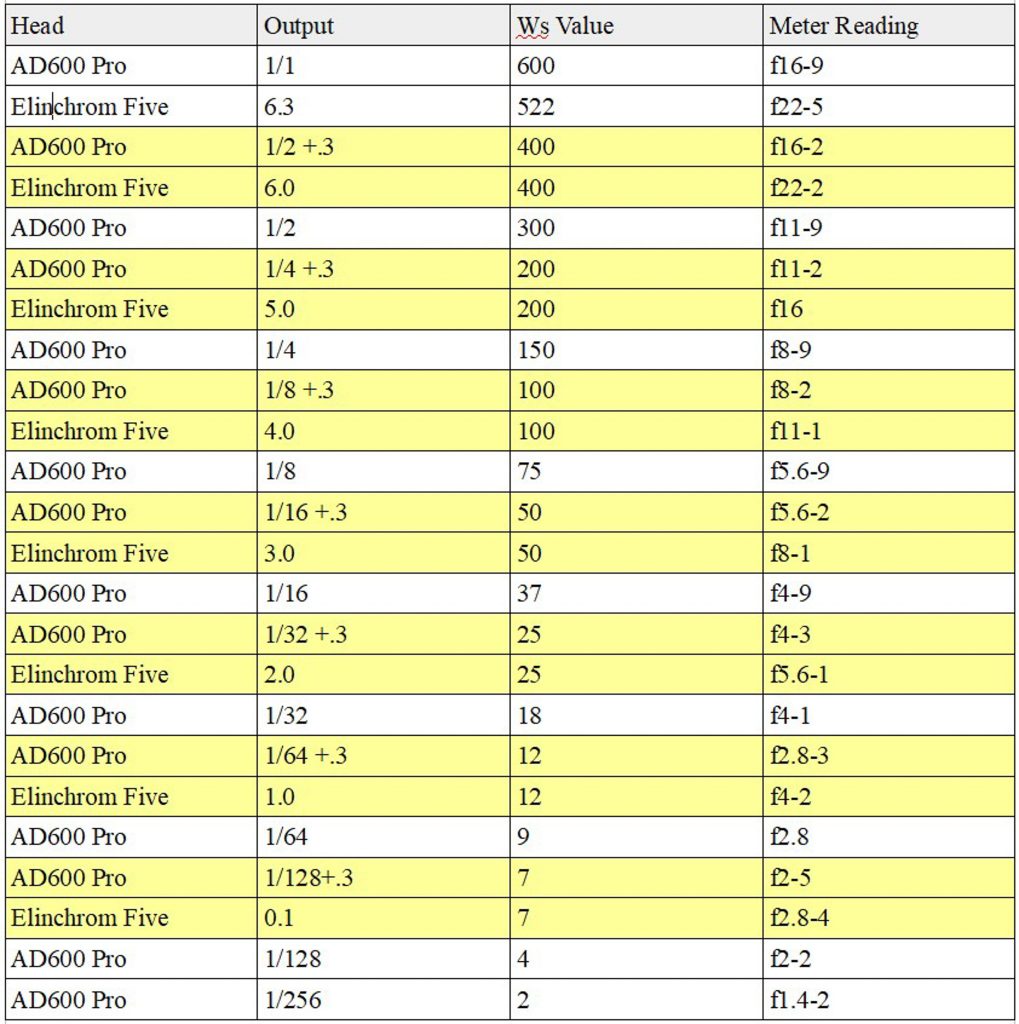
To be perfectly honest, I wasn’t too surprised at the results. The Elinchrom Five was consistently one stop brighter at comparable outputs, throughout the range. This was pretty much what I had found with the Elinchrom One when compared with the AD200 Pro.
The Elinchrom heads are just more efficient. This also explained the ease with which the Elinchrom Five completely shut down the ambient light when shooting the motorcycle outside the Leeds TFC.
Conclusion
I walked into the first workshop with pretty much no hands on experience. I’d had a read of the manual, turned it on and went through the documentation. It was all very familiar, and rather reassuring. The mount is very robust, and will hold large or heavy modifiers without any concern. I like the change with regards to the modifier lock being a simple switch, similar to the D-Light range.
I felt instantly at home with it, and it dropped into my workflow effortlessly. I initially had concerns the USB C cable would possibly drop from the head during charging, but it pushes home very securely, and the putting velcro tie through the handle means it really can’t come out, even if you give it a less than gentle tug.
It really is a nice bit of kit, and the reason I suggested using them on Helen’s shoots.
And that got me a whole can of worms.
Helen loves the ELB500, and believed the Fives were just going to do the same job for us, but in a heavier package. The heads weigh 3Kg with battery insitu. The ELB500 weigh 2.5Kg for the pack and battery. Then you have a head with cable, so to be honest, there’s very little in it, and you only carry the kit from car to venue.
However, she found that the set up time for the mobile studio was far quicker with the Fives, as you didn’t need the adaptor for the smaller head of the ELB500 to fit the Elinchrom mount. You didn’t need to unpack a head, a battery pack, an adaptor etc, and hook them all up. It was literally open the modifier, grab a head and mount it, then lift the lot onto the lightstand.
It might not sound a big deal, but in a busy mobile studio, it makes a huge difference.
Put it this way. Normally, if I say to Helen “I really like *some new lighting head*, and I think they’d be worth buying. Her response is “Why on earth do you need two types of head to do exactly the same job?”.
After this review, and using them both at the workshops and in the mobile studio, I was particularly enamoured with the Fives, and told Helen I wanted to replace the ELB500 kit with a set of Fives. She shook her head and my heart sank.
She said “No, don’t get rid of the ELB500, we still have a specific need for smaller heads on some shoots.” I shrugged and said fair enough. She then said “Get the Fives as well.”
Ladies and Gentlemen, that’s a first!
Woohoo!