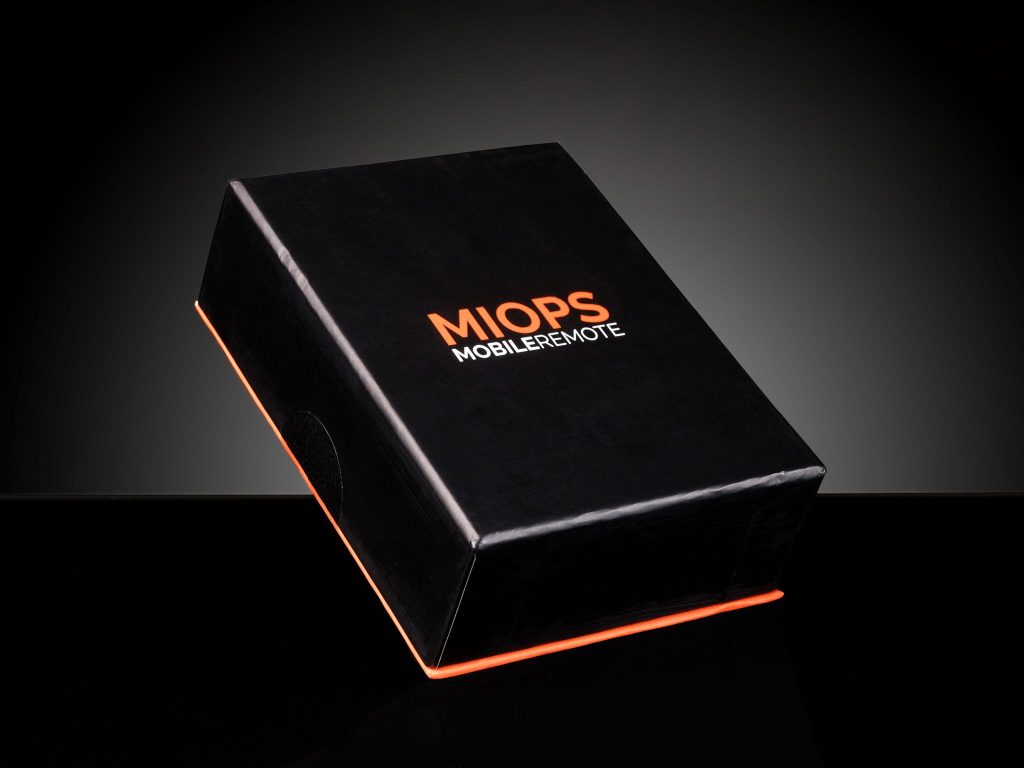
My initial interest in this unit had nothing at all to do with studio work, or even lighting for that matter. It basically utilises your mobile as a wireless, feature rich remote release. There is some overlap with the Miops Smart, such as the HDR mode and timelapse mode, but with a slightly different approach. The unit is small. Well, it’s actually tiny.

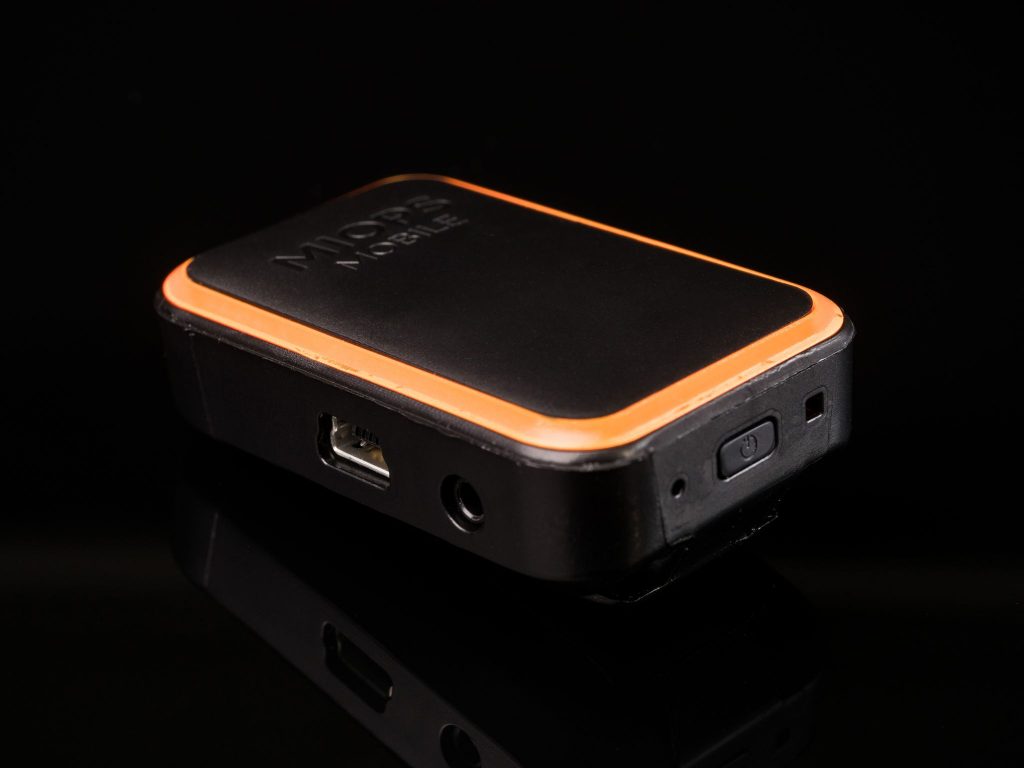
That’s a UK 5p piece, which is 18mm across, sat alongside the unit in its box. It’s basically just a receiver with a rechargeable battery, as all the intelligent bit is done by the phone app. Clever!
There are six categories, each with a number of modes. My original reason for purchase were some of the cable release modes and potentially the timelapse modes, although I’ve since found it extremely useful in the studio. I’ll go through each category and modes.
Cable Release Modes
Cable Release
This is the most basic of the release modes. Touch the red graphic button on the app, and your camera fires off a shot. There are no settings, it’s simply a big graphic button and you touch it. This was the second mode I had ended up using in the studio, after utilising the sound mode mentioned later in this article.
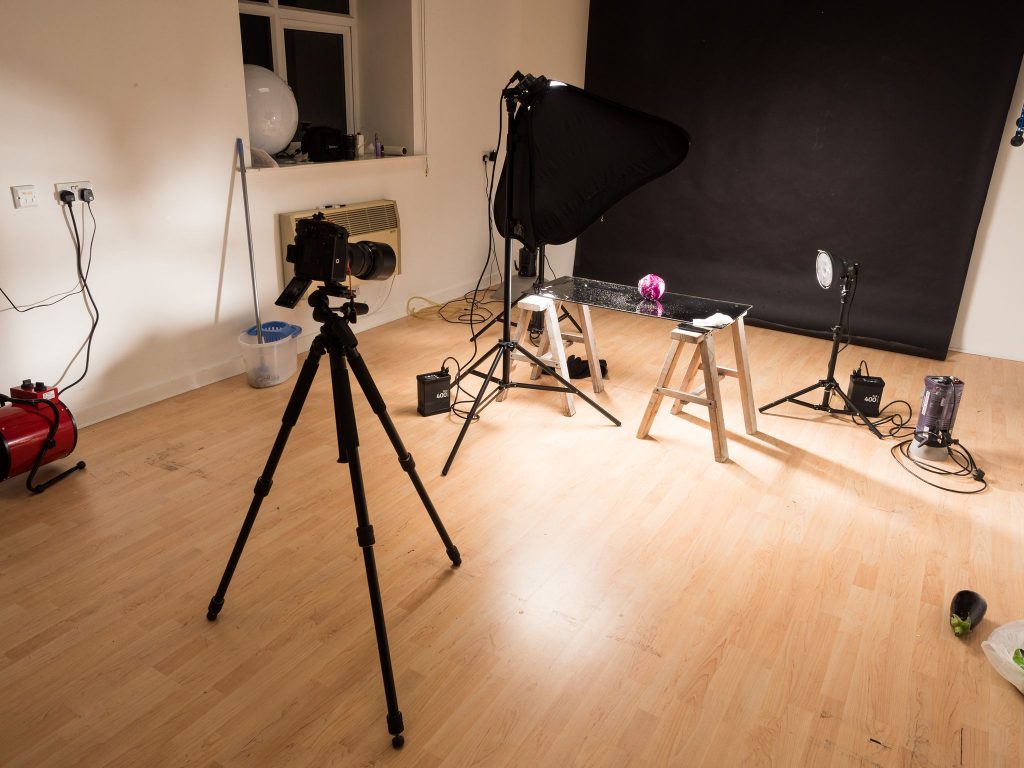
As a commercial photographer, there are times when I am given a ton of products to shoot, and quite often in reality, there are maybe thirty or forty different products, with a dozen colour variations of each. I usually have all the grouped products together, and laboriously place a product, go to the camera and press the shutter, go back to the table, swap to the next colour variation and repeat. Following the success of the Red Cabbage shoot mentioned later, I simply stayed with the table, swapped the product and tapped the phone, then swapped the product and repeat.
It may not sound like a big deal. After all, how long does it actually take to get up and walk to the camera and fire the shutter, and then walk back again? 30 seconds? From previous shoots for the same client, I know it normally takes around four to four and a half hours for the volume of products I had that day. I completed it in three hours. It was quoted on a project basis, rather than by the hour, which means increased profitability. Or, you can quote a little lower if you believe the client is shopping for quotes and you feel you need to be more competitive. Either way, this one shoot paid for the Miops Dongle, and more than that, it proved its worth in the studio environment. I’ve since used it regularly in similar situations at the studio.
Press and Hold
Old school cable release in the film days. Press the graphic button and the shutter stays open until you take your finger off it. The camera shutter is required to be set to bulb. There’s a timer that runs whilst the shutter is open, allowing you to see the length of the exposure. A nice touch.
Press and Lock
Similar to the previous “Press and Hold”, but this requires a touch of the button to start the exposure, and a second touch to stop it. The timer is available here too.
Timed Release
For timed long exposures. If you’ve been frustrated by the maximum exposure available with your camera, this is the mode for you. Set your exposure duration. Press the graphic button, and off you go. The time of the exposure can be set for a maximum of 99hrs, 99m and 99secs. And also down to 1/100th sec too. Far more flexible than any camera setting, and most remote releases.
Self Timer
Most cameras seem to have two options for their self timer. A short option at two or five seconds, and a longer option at ten or twelve seconds. The Miops Mobile has the same timing options as the timed release, so you can actually set it to anything from a .01 of a sec, right through to a hundredth of a second shy of 100 hours. So, if you are one of those landscape photographers that likes to have a figure in the landscape for scale (Joe Lord, take note!) and it’s going to take a good twenty minutes to scale that rock in the middle of nowhere, then this is certainly for you.
Timed Release And Self Timer.
This is a combination of the two functions, allowing you to set a timer, and then going on to make a long exposure. Once the timer has expired, the exposure is then made for the set amount of time.
Timelapse Modes
Basic Timelapse
Very simple timelapse mode. Set the time interval between frames and the number of frames to be shot, and off you go. If you do not set a maximum number of frames, the sequence will continue until you stop it.
Long Exposure Timelapse
This mode allows you to create a timelapse of long exposure images. In addition to the settings of frame interval and number of frames, there is a third option for the length of each exposure. The camera needs to be set to bulb mode for this.
Bulb Ramping Timelapse.
This is an interesting option. It operates in a similar way to the Long Exposure mode, but it will change the exposure value throughout the timelapse sequence. You set the initial exposure and the final exposure, and each exposure is gradually increased between the two values.
Road Lapse Mode
This is one on it’s own, and quite an interesting use of your phone’s GPS function. You set the distance you wish to take images over, and also set the number of frames to shoot during that distance. Just the two settings.
HDR Modes
HDR
Similar to the HDR Mode with the Miops Smart Trigger. You set the centre exposure value, the EV value between exposures, and the number of frames to make up the bracketed sequence. The camera needs to be in bulb mode.
HDR Timelapse
Now, this is interesting. Same as basic timelapse, but each exposure is bracketed. Each frame will need processing to create the individual HDR frames that would then be used to create the final timelapse. Quite a bit of work in the post processing, but the final timelapse will be quite something to see. The volume of data recorded is going to be huge if you’re shooting seven frames per final image. Definitely requires a large memory card!
Sensor Modes
Sound
Uses the phone microphone to trigger your camera. It can be set to trigger continuously, or just a single frame, and the sensitivity can be set to reduce the chances of misfiring. There is a slight delay in triggering when compared to the Miops Smart. Whilst the Miops Smart has a built in microphone, and can trigger pretty much instantly, the Miops Mobile relies on the phone to recognise the event and then signal the camera to fire, which takes additional time. The delay is extremely small, but it’s noticeable when compared to the Miops Smart.
This is one of the modes I used in the studio.
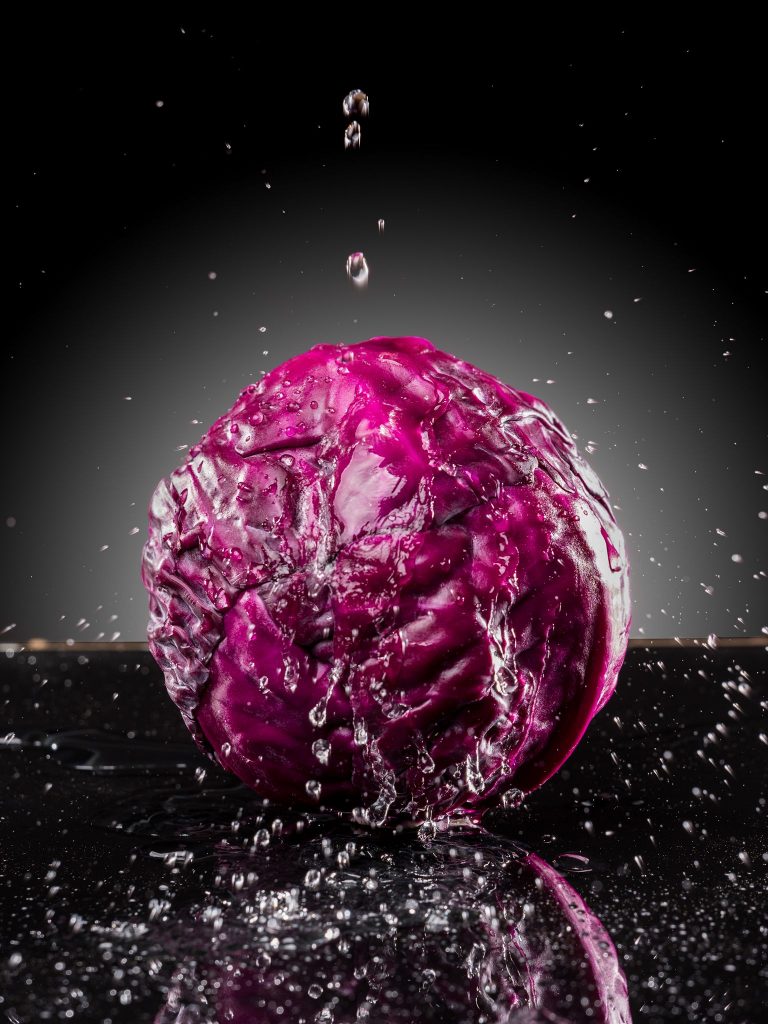
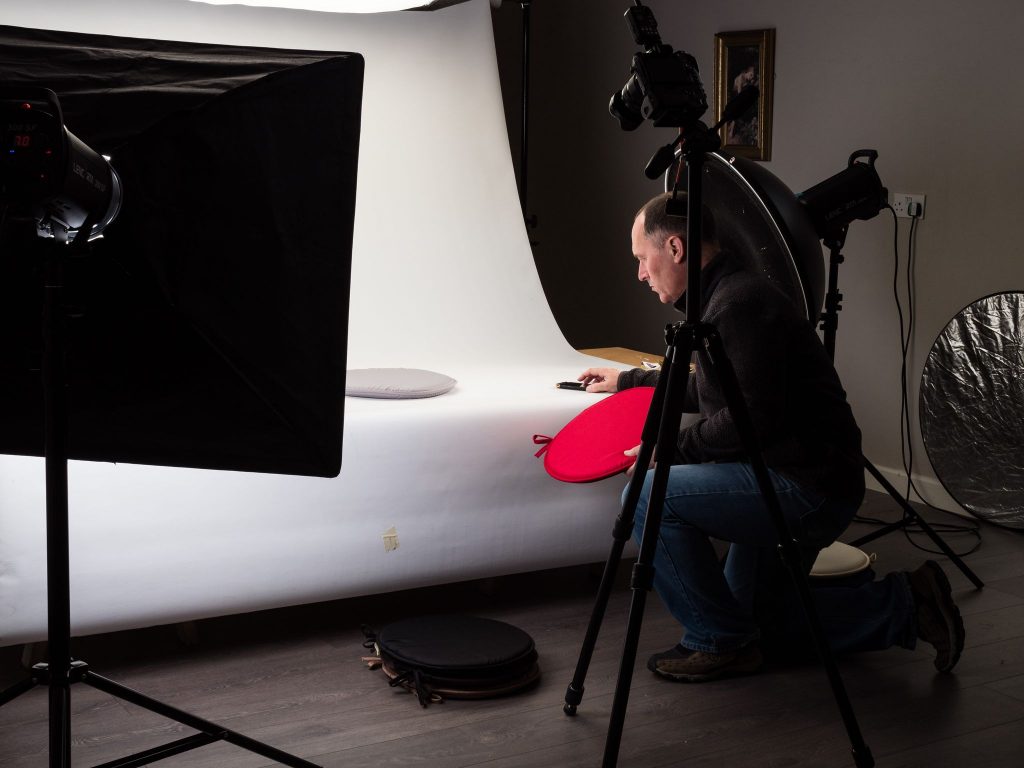
I normally work with an assistant (or two), so having additional hands when doing something quite intricate isn’t normally a problem. However, I was working alone on some food imagery for a couple of clients, and found I couldn’t trigger the camera and pour water on the subject at the same time. Because I’m old, and my memory is a bit tripe, I actually went as far as trying to use the camera’s self timer a couple of times before I remembered the Miops Mobile sat in my case. In my defence, up until this point, I hadn’t considered the Miops Mobile for any of my studio work until this particular shoot.
I connected the Miops Mobile to my external release port on the camera, and allowed it to hang down, as the hotshoe was already occupied by the trigger for the studio flashes.
I poured the water onto the red cabbage and got the above image on the first attempt. And obtained equally good images on the 2nd, 3rd, 4th and 6th attempt. I missed the cabbage with the water on the fifth, and my sudden swearing triggered the shutter, giving me a bogus 5th attempt. Setting the shot up was a nothing thing, and even with the signal processing delay, I got my shot. If the delay was an issue for the type of shot I was after, I would have chosen to use the Miops Smart instead. As a “third hand” in this situation, it was ideal, and a lot cheaper than utilising an assistant for an hour or two.
Vibration
Similar set up procedure to the sound mode, and similar in operation. Any movement or vibration detected by your phone will initiate a shutter release. A single frame or continuous shooting, depending on the configuration you have set.
Motion
This mode makes use of the camera on your phone. I suspect it awaits a change in contrast, signalling movement within the frame, before initiating a shutter release. You can adjust the sensitivity, delay and the number of frames to be shot.
Scenario Mode
The scenario mode allows you to combine specific steps and modes, including delay between modes, to create a custom sequence of events. As an example, you may use a standard timelapse for six hours, and then use the bulb ramping timellaps during sunset, before finally switching to a HDR timelapse sequence. Certainly food for thought.
You can add up to five modes plus the delay parameter.
Miops Dongle
The Miops Dongle is an adaptor between your mobile phone and your camera release cable. It utilises the same App as the Miops Mobile, so all the above mentioned points regarding the Miops Mobile app, is relevant here too. At first thought, you may ask why? For me, it’s backup. If my Miops Mobile runs out of steam due to the battery going flat, then the Dongle will save the day. Alternatively, if I need to run two cameras on a shoot, I can use the app on a tablet with the Miops Dongle, and use the Miops Mobile with my phone.
Talking about the battery going flat, and this applies to both the Miops Smart and the Miops Mobile, you can run them both from one of those Li-ion battery packs that we all use to recharge our phones when out and about. The battery charging ports on both triggers are connected via USB, so one of those battery packs with a USB output is ideal. If you are considering ultra long timelapses, then you understand the issue with battery drainage over long periods, and this should be a welcome option for you.
Conclusion
Miops Mobile & Miops Dongle
The Dongle is a very cheap way to make use of such a comprehensive and useful triggering app. The Miops Mobile simply increases the usability and usefulness as a whole. As a professional, I tend to value equipment based on a couple of factors, which is the income it can bring in, or the time it can save. Both factors have an impact on the profitability of the business. It’s quite rare that a piece of equipment can recoup its value during the first shoot, yet each Miops trigger managed to do just that, and a lot more since.
The Miops Mobile app is very straightforward to use, and quite intuitive. It comes with clear documentation which you will find you only need to read once. The tiny size of the Miops Mobile means it just doesn’t occupy any real space within my kit bag, and certainly doesn’t add to the weight. Whilst the use of a phone for the “brains” of the triggering episode may introduce a tiny delay when compared to the Miops Smart, it’s not really an issue when considering the tasks this device was created for, and the scenarios it will likely be deployed in. It was never designed for action stopping photography, such as that captured by the Miops Smart. But what it does, it does extremely competently, and it does it very well.
Miops have a list of distributors on their site at www.miops.com
If there isn’t a distributor in your country, you can buy direct from Miops,
These units were purchased from the UK distributor, UK Highland Photography

Great review much needed